Tutorials
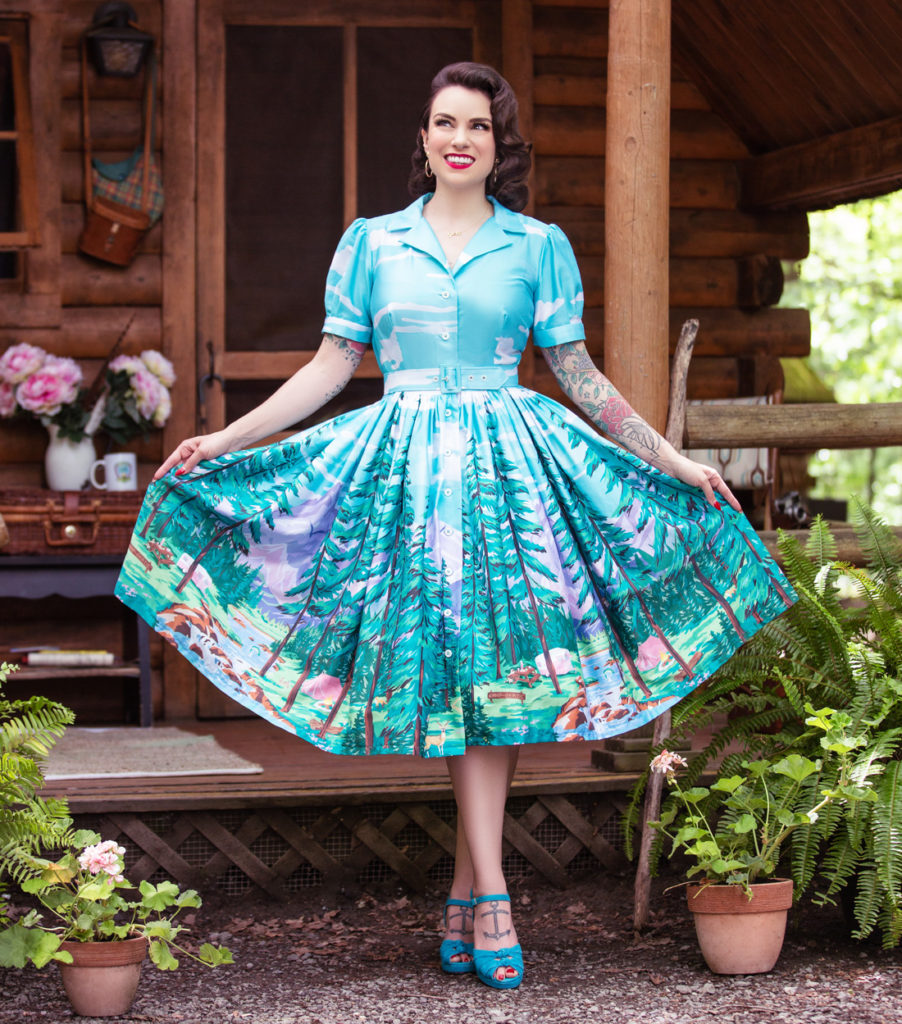
Using a Border Print Fabric for Your Scout Dress
Jul
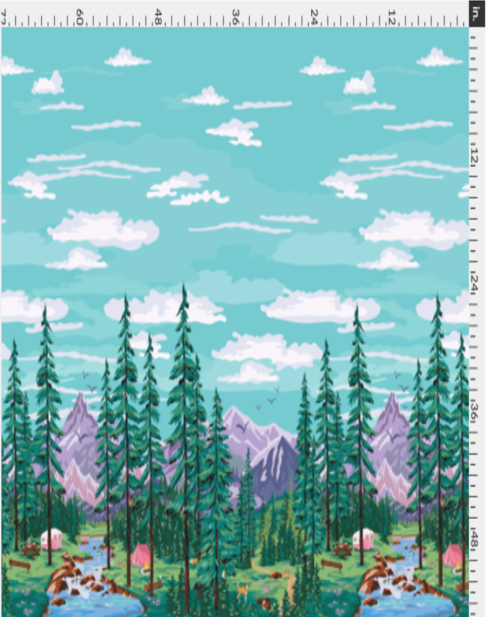
I love border print designs from the ’50s, especially anything with a scenic landscape — so I knew we had to make a Camp Gertie-themed print for you, complete with a pink Shasta camper and frolicking fauna! Border prints require some special consideration when it comes to picking your project, but also in deciding how to cut your pattern pieces. If you look at the orientation of the print below, you’ll see that the print runs parallel with the selvage, so the forest scene is in a straight line along one edge. This is why so many border print skirts are dirndl-style, meaning that they are simple rectangles that get gathered at the waist (as opposed to circle skirts that have a curved hem).
Our new Scout Dress (available on Patreon) has gores and a curved hem that make the skirt less than ideal for the straightness of the border print. So here, we’re going to show you how to adapt the Scout Dress for use with our Camp Gertie border print.
Cutting Your Skirt
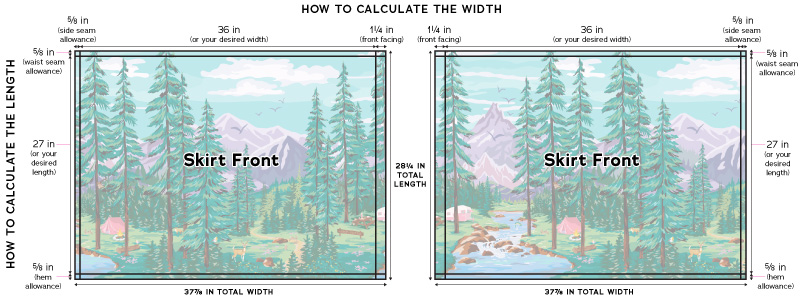
To create the border print skirt, I cut 3 rectangles. Cut these pieces with the lower half of the print (the forest scene) on the bottom of your skirt, and reserve the upper half of the print (the sky and clouds) for your bodice). Note that you will be cutting everything in a crosswise layout (with the print running horizontally around your body), so the pattern pieces will be turned in a different direction than you may be used to for a conventional cutting layout.
For the skirt front pieces, I cut two rectangles. For the width I measured 36 inches (in), plus 1¼ in for the front facing, and ⅝ in for the side seam allowance, totaling 37⅞ in wide. I like my skirts 27 in long, so for the length I measured 27 in, plus ⅝ in for the waist seam allowance and ⅝ in for the hem allowance, totaling 28¼ in. As you’re cutting, check where the print will be oriented on your front skirt panels to make sure you’re happy with the print placement.
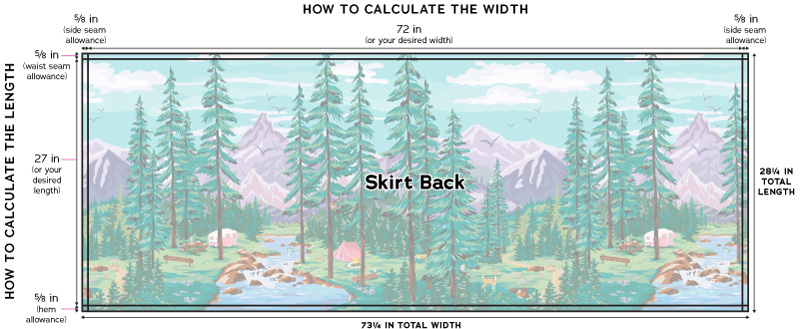
For the skirt back piece, I cut one rectangle 72 in wide, plus ⅝ in seam allowance on both sides, totaling 73¼ in wide by 28¼ in long.
Sewing the Skirt
- Interface skirt front opening: using the skirt front interfacing (14) pattern piece, apply interfacing to the (WS) of center front of both skirt front pieces.
- Finish vertical edges on skirt front and skirt back pieces using your desired method. Finish edges on Pocket Bag (13).
- Attach pockets to skirt: pin pocket bag to each side seam on the skirt front and skirt back piece RS together. Stitch using a ⅜-in (1 cm) seam allowance. Press pockets toward seam allowances.
- Sew side seams: pin skirt fronts to the skirt back at the side seams. Stitch. Pivot at top and bottom of pockets and stitch around pocket edges. Clip into pivot points on back seam allowances, and press pockets toward skirt front. Press seam allowances open above and below pockets.
- Gather skirt: using a 4-mm- to 5-mm-long gathering stitch, sew two lines of stitching along the skirt waist edge, starting and ending 2-½ in from the skirt front opening edges. Sew the first using a ½-in-wide (1.3 cm) seam allowance and the second using a ¼-in-wide (6 mm) seam allowance. Pull up bobbin threads from each side toward the center back to gather skirt.
- Attach skirt to bodice: pin gathered skirt to bodice, matching side seamlines. Stitch. Grade seam allowances so bodice’s is the widest. Finish seam allowances as desired. Press seam allowances toward bodice. Press bodice and skirt facing to inside of dress.
- Sew buttonholes on right half of skirt opening: mark buttonhole placement on fabric RS, using the Scout Dress skirt pattern as a guide for the placement. Sew buttonholes following your machine’s buttonhole instructions and
- Sew buttons to left half of skirt opening to correspond to buttonholes.
- Hem the dress: Press up the hem allowance and turn in the skirt front facings. Narrow-hem the skirt by machine or invisibly by hand, catching the facings in your stitching.
Enjoy your beautiful border print Scout Dress!