Tutorials
How to Make a Fabric-Covered Belt

Jul
Nothing looks more fabulous than a perfectly coordinated belt made in the same fabric as your garments! This tutorial, written for us by Collin Riley, is the process we used to create the belts for our Scout Dress sample dresses. It can be used with most light- to medium-weight fabrics. We combined techniques from both vintage and ready-to-wear examples to create a beautifully finished belt that you will enjoy for years to come!
Materials
- Belt fabric and matching thread
- Medium to heavy non-woven fusible interfacing
- Marine vinyl
- Covered belt buckle kit (we used a 1½-in kit)
- Microtex needle, size 90/14
- Quilter’s clips or paper clips
- Awl
- 5 grommets/eyelets (size 00 or smaller)
- Grommet/eyelet setting tool
- Small pliers

Resources
A note on covered belt kits
Typically covered belt buckle kits consist of three parts: the outer buckle that is a hollow frame to be wrapped in fabric, the interior piece of the buckle that is pressed into the frame to close it, and the toggle that is crimped around the center bar of the buckle. There are many different shapes and sizes of these kits, and the measurements below are for a 1½-inch (in) rectangular buckle.
Cutting
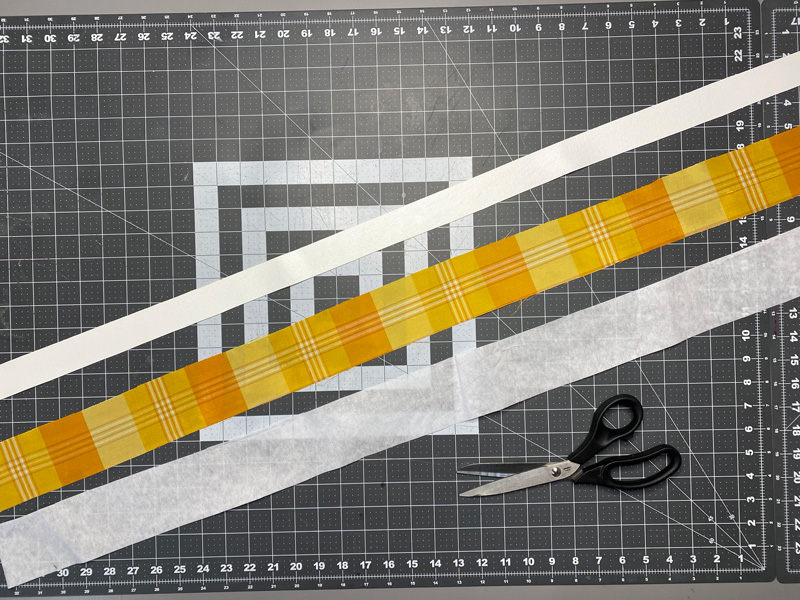
To create the pattern for a 1½-in fabric-covered belt you will need to cut a rectangle the length of your waist measurement, plus 8 in. For example, a 32-in waist measurement plus 8 gives you a 40-in rectangle. Make the rectangle’s width 2¾ in.
Cut 1 rectangle from fabric, and cut one from interfacing. This will be referred to as the Belt Front.
Also cut 1 rectangle from vinyl the length of the Belt Front, minus 2 in. Make the width 1⅜ in. This will be referred to as the Belt Backing.
Construction
1. Prepare the belt front: apply fusible interfacing to the Belt Front fabric, making sure the interfacing is fully fused and has no bubbles. Press under ⅝ in along both long sides of Belt Front. Using a ruler or seam gauge, check that the right side (RS) of the belt front is 1½ in and trim any spots that may not be perfect.

2. Miter the belt end: select one end of the belt front as the finished end to slide through the buckle. If you're using a directional fabric, think about which side you prefer to wear your belt ends on, right or left. This may affect which end of the belt you finish. From wrong side (WS), fold back one corner of the end at a 45-degree angle and pin. Fold back the remaining corner over the first in the same manner, creating a point. Pin and press this point so it is crisp.


3. Trim the Belt Backing: with WS together, center the belt backing on the belt front. The Belt Backing will have 1/16 in of space on either side, and the Belt Front will extend 2 in longer than the backing on the unfolded end. Trim the Belt Backing to match the pointed end of the belt front.


4. Sew the belt: using quilter’s clips or paper clips, secure the two belt sections together all around. Make sure the belt backing is centered. From the RS, topstitch by machine around the entire belt using a ¼-in seam allowance, pivoting with the needle down as you sew the pointed end of the belt.


5. Make belt notches: mark the grommet/eyelet placement, starting 2 in from the tip of the belt point and centering within the width of the belt. mark 5 dots spaced 1 in apart. Use an awl and poke a hole at each mark, then secure a grommet or eyelet in each hole according to the instructions for your setting tool. Tip: poke the hole and secure the grommet one at a time, as the fabric’s fibers may close up quickly.


6. Prepare the belt buckle fabric: remove the paper from one side of the double-sided sticker included in the belt buckle kit. Apply the sticky side to the WS of a square of your belt front fabric larger than the sticker. Press the sticker down firmly and smoothly so all corners are secure to the fabric. Trim the excess fabric around the edge of the sticker. Snip into the slashed lines on the sticker, along the centerline, and into the diagonal corners. Do not trim past the slashes on the sticker.


7. Finish the belt buckle: remove the remaining paper from the sticker, revealing the second sticky side. Firmly press the larger, hollow exterior piece of the belt buckle to the fabric/sticker. Be sure to center the buckle on the sticker so that the slashes line up with the buckle corners. Roll the edges of the fabric/sticker around to the inside of the buckle, taking care with the corners. Make any additional snips into the corners as needed to get the fabric/sticker to lay smoothly. When the fabric is fully adhered, press the buckle’s smaller backing piece into the hollow fabric-covered buckle piece. Lay this on a flat surface and press firmly to secure the buckle as one unit. Use pliers to crimp the center bar in the middle, and to close the toggle around the center bar.


8. Sew the belt to the buckle: using an awl, poke a small hole centered in the belt 2 in from the unfinished end (right next to the end of the vinyl backing). Use a seam sealant like Fray Check on the hole if desired. Thread the unfinished end of the belt through one side of the buckle, orienting the toggle to point away from the belt. Slide the toggle through the hole in the belt, and feed the belt end through the other side of the buckle and back onto itself. Turn under the raw edge of the belt ½ in and stitch the belt through all layers by hand or machine using a zipper foot.


Some notes:
- If you prefer, you can omit the vinyl backing and cut two belt fronts with a heavy interfacing. Place these two pieces WS together and topstitch as directed above. You may prefer to insert a length of ban-roll (a roll-resistant waistband interfacing) or double the interfacing to stabilize the belt.
- Machine-sewn buttonholes or eyelets can be used in place of metal grommets or eyelets. Test this on a scrap of fabric and vinyl sandwiched together and adjust your machine settings as needed.
- For a belt buckle without a toggle, you can omit the notches on the belt and the hole for the toggle. Instead, try on the finished belt and sew a hook-and-bar closure invisibly to the belt to secure it closed to your waist measurement.
- You can create a seamless belt by using fabric glue in place of topstitching to secure the vinyl backing to the belt front.
Enjoy your new fabulously coordinated belt!