Charm Christmas
Charm Christmas: Holly Applique Tutorial!

Dec
It’s the most wonderful time of the year! I’m so thrilled to present the Charm Random Acts of Christmas–– throughout the month, we’ll be surprising you with holiday gifts and tutorials when you least expect it. (You’ll never see us coming!).
For our very first tutorial, we’re bringing you the Holly Hepburn sweater–– we created the Hepburn Top in a cozy wool blend and covered it in holly leaves and berries for a little whimsy. I used my new Cricut machine to cut these out of wool felt, but if you don’t have one you can just as easily cut these by hand (we’ve provided you with files for both approaches!). Finish the whole thing off with some beading and embroidery, and you’ve got a fabulous festive look!


We were inspired by the fabulous Juli Lynne Charlot–– you may know her as the inventor of the Poodle Skirt, but she also created coordinating sweater sets with the sweetest appliques and embellishments. She created this delightful holly cardigan in the ‘50s, and my heart has not known peace since.
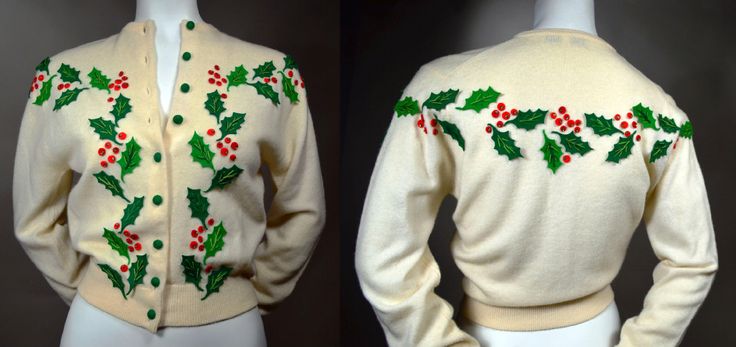
The holly appliques pair beautifully with our Hepburn Top (the holly ever so perfectly complements our back v-neck detail), but it’s a great way to jazz up any sweater in your wardrobe too! I can’t wait to see your takes on the design: be sure to tag us using #HollyHepburn so we can see your makes! Full tutorial and resources list below –– happy sewing!
Supplies:
- Sewn Hepburn Top. We used the Round-Neck version with long sleeves, and chose this cozy wool blend knit.
- Holly template: Click here for the Cricut file, or here if you're cutting them out by hand.
- 8” x 12” pieces of wool felt in bright green, medium green, bright red, and dark red.
- Heat N Bond iron-on adhesive interfacing or other fusible web
- String of amber rondelle beads (I used a 9-inch strand of 2x3mm glass beads from Michael’s)
- Green embroidery floss (I used a variegated hand-dyed green floss from Weeks Dye Works, purchased at Beetle & Fred)
- Cricut (or other brand) cutting machine OR stencil material to hand cut your templates from. I used a Cricut Maker 3 with a 12x12 FabricGrip mat.
Instructions:
- Download the svg or pdf file below. The svg files are for Cricut or other cutting machines, and the pdf can be used to cut out of stencil material and create a traceable stencil trace onto your felt and cut by hand.
- Fuse Heat n Bond to the wrong side of your wool felt pieces, leaving the paper intact for now.
- Cut your holly leaves and berries from your felt using the method of your choice. For the Cricut, I applied the felt with the paper-side down to the Cricut mat, and rolled it with a brayer to get rid of any bubbles. Use a rotary blade in your machine and cut each set of leaves and berries. Using a pair of tweezers, lift out each cut leaf and berry from your felt (it’s fine if the paper backing comes off at this point).
- Remove any remaining paper backing from each of your leaves and berries.
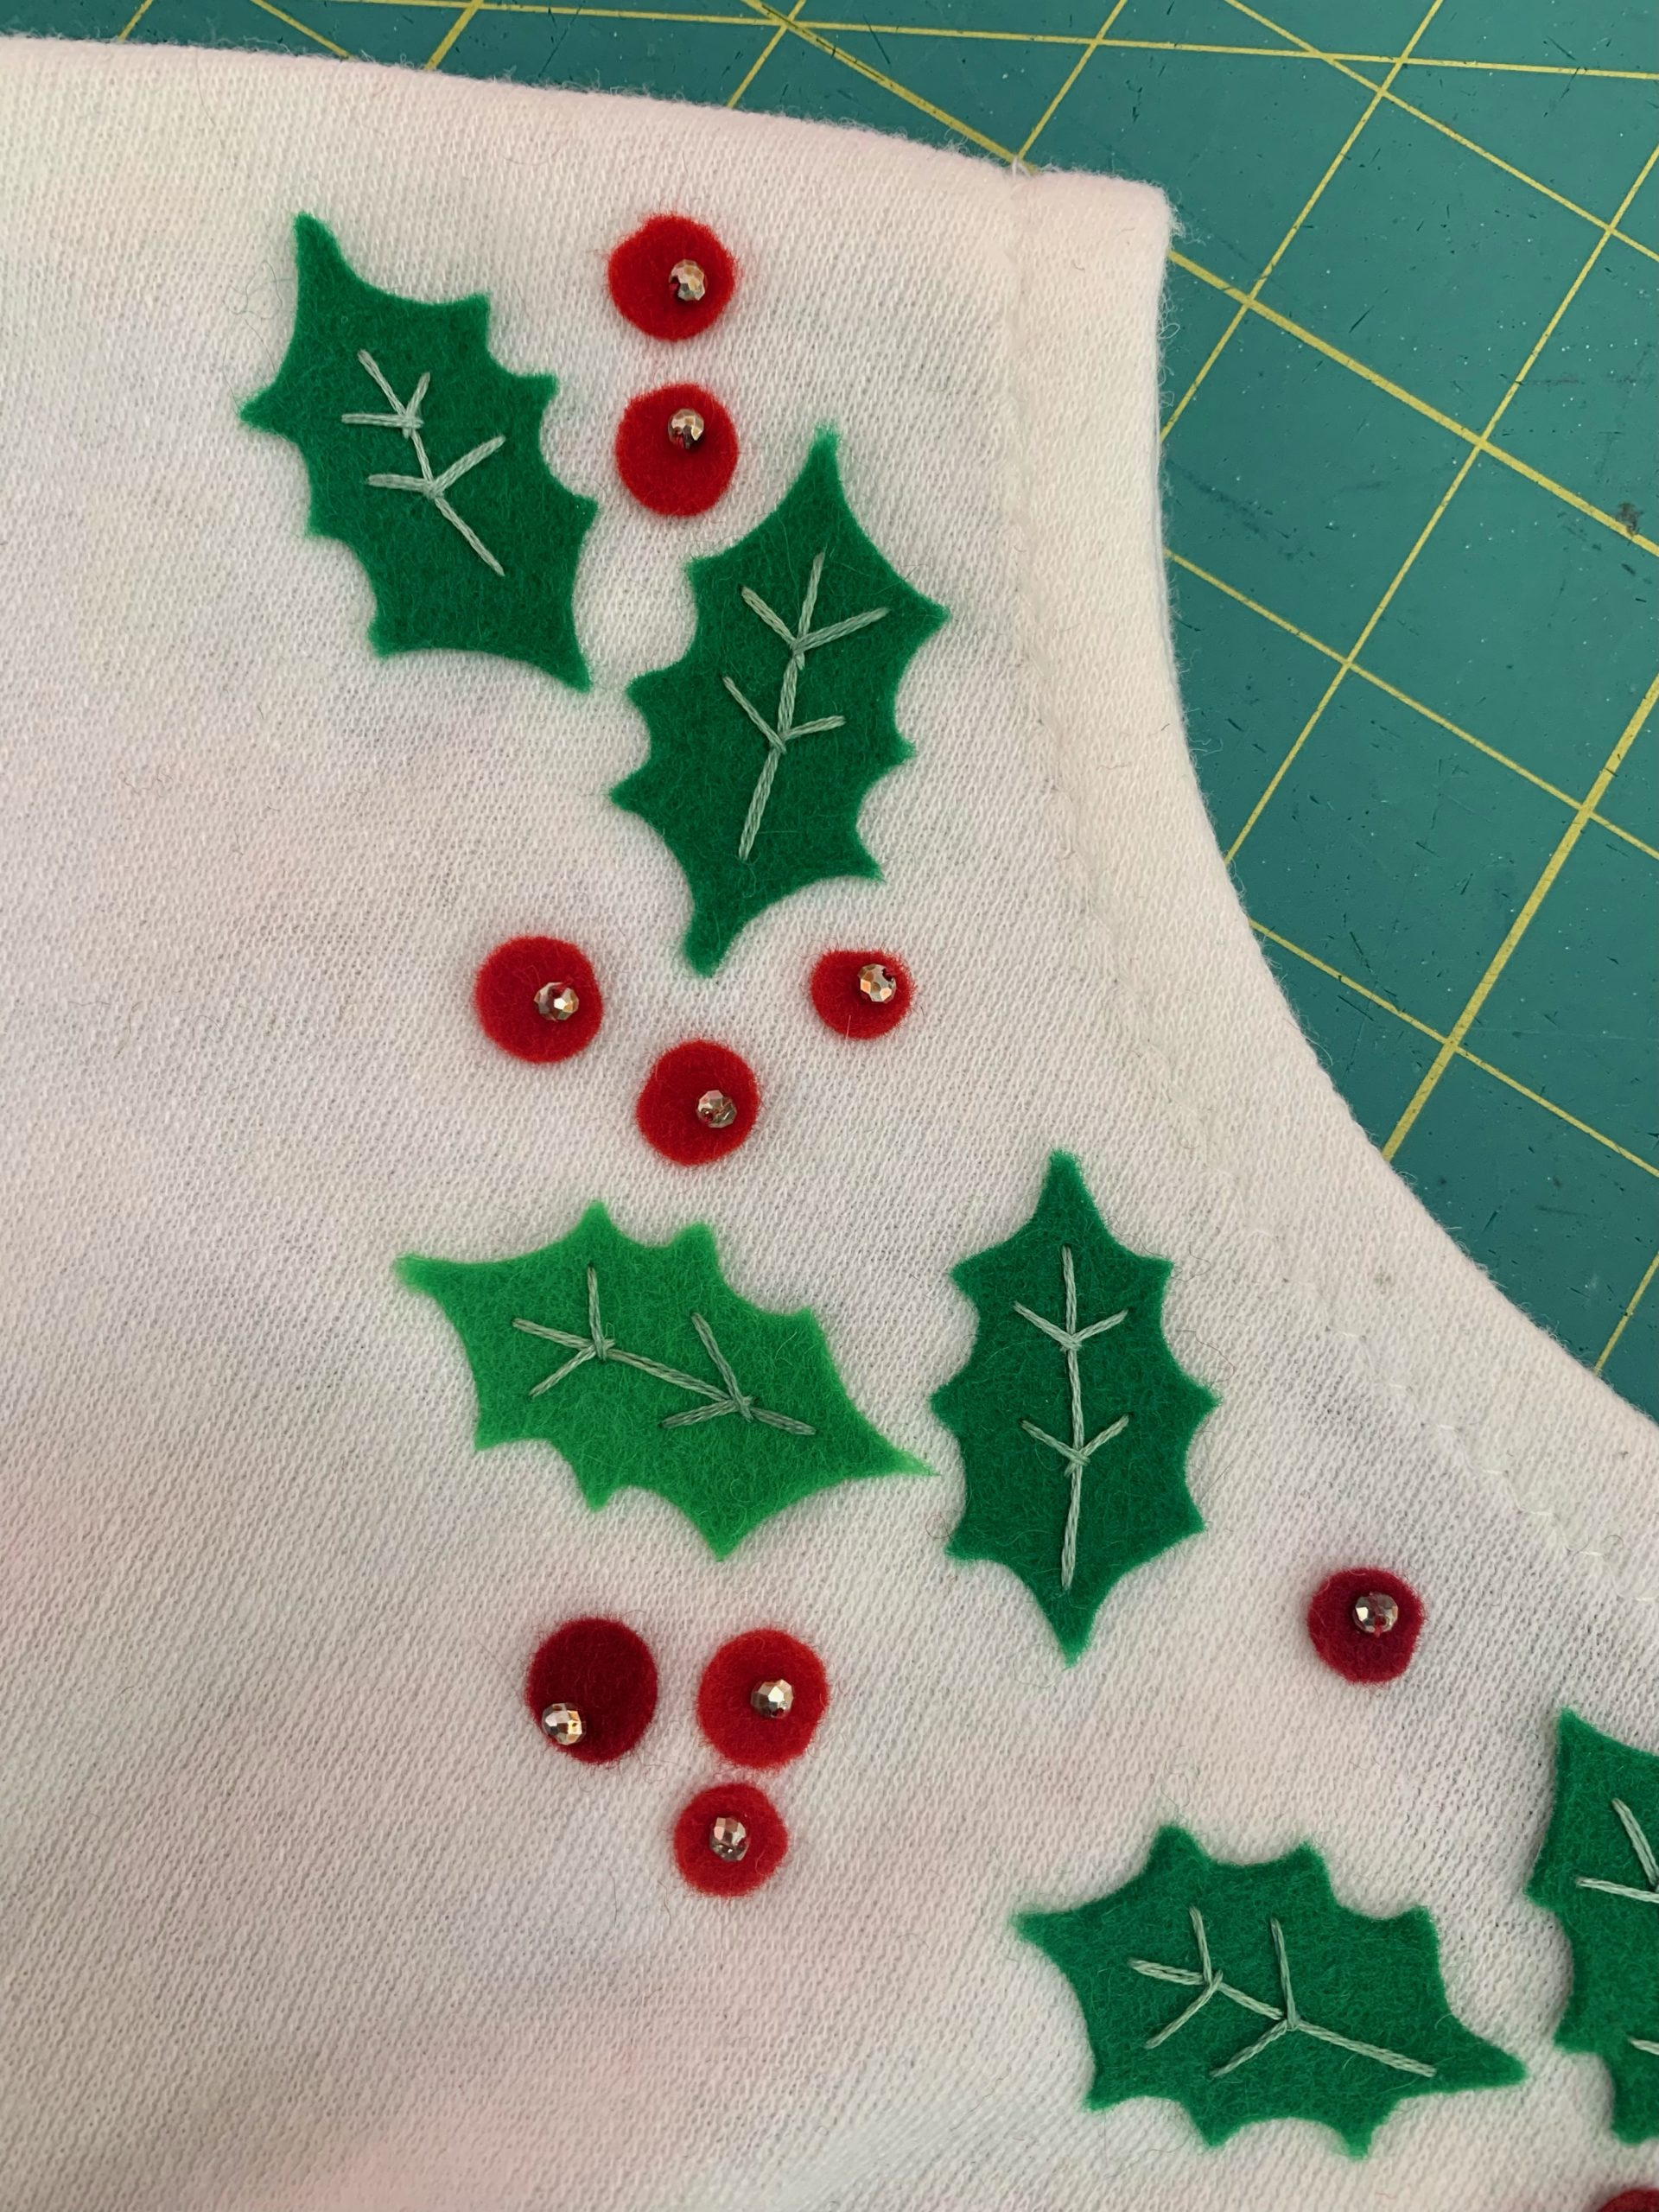
- Arrange the leaves in pairs around the neckline of the Hepburn Top and then fuse in place using a press cloth and iron. I used mostly medium green leaves and then added a bright green leaf to every other pair. On the front of the top, I oriented all the leaves in the same direction. On the back, I arranged the leaves around the v-neck, pointing away from the center back and going toward each shoulder.
- Sprinkle berries throughout the leaves, alternating colors and sizes of berries randomly. Fuse in place.
- Stitch a bead onto every berry with regular all-purpose thread, placing the bead not quite at the center of the berry for a more organic look.
- Create long embroidery stitches on the leaves, using three strands of embroidery floss, as shown below.
I can't wait to see your holiday delights! Happy sewing!
Xoxo,
Gertie