Sew Along
Rita Blouse Sew-Along 7: Steps 14 and 15
Oct
Hi everyone! At this point in the sew along, we have inserted the elastic into the neckline and sleeve casings but have not sewn it permanently yet. It is safety pinned in place so that you can test and adjust the fit if needed. After that, we will stitch the elastic in place permanently.
I wanted to devote a whole post to these two steps, because the elastic fit is really important on this blouse. In one of my early test version, I experimented a lot with the neckline elastic length. I found that it was really tempting to pull the elastic very snug around the neckline–and once I did that, I started noticing all sorts of bust fit issues! The underbust seam was too high, the neckline didn’t look flattering, and I started considering all sorts of major revisions to the pattern. Luckily I had the good sense to try to add length to the elastic, because making it looser was a miracle cure! The underbust seam fell down to where it was supposed to be, and the neckline and bustline looked fabulous.

The elastic lengths given in the pattern are my preferred length, and then they are graded up and down for the entire size range. Will these numbers work for everyone? Of course not! I think they are on the longer side, and that gives you the room to shorten if necessary. However! Please do not pull the neckline elastic too tight! It should not be that snug, it should sit easily on your shoulders without pulling. If pulled too tight, it will create more tension than needed in the neckline and it will also create a poor bust fit.
When testing the fit, also try wearing the blouse off the shoulders, if you plan to do that at some point. See how the fit is when worn that way.

Repeat the fitting process on the sleeves, if you are using elastic there. Again, resist the temptation to pull the elastic too tight. My sleeves have about 1/2″ of ease, they are not tight to my skin.
Once you’re happy with the fit, cut down the elastic if needed, leaving 1″ to overlap.
Now for step 15!
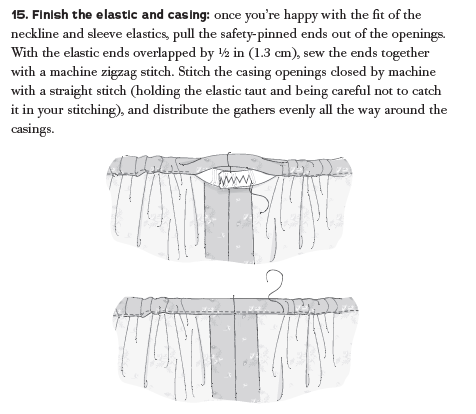
Pull the elastic out gently to overlap the ends by 1/2″ and zigzag them together as shown.
Finally, put the elastic back in the casing and edgestitch the opening closed.
You’ll need to spend a couple minutes now making sure that the gathers around the elastic casings are distributed evenly around the neckline and sleeves.
Next week, we’ll move on to our final step: hemming!