Sew Along
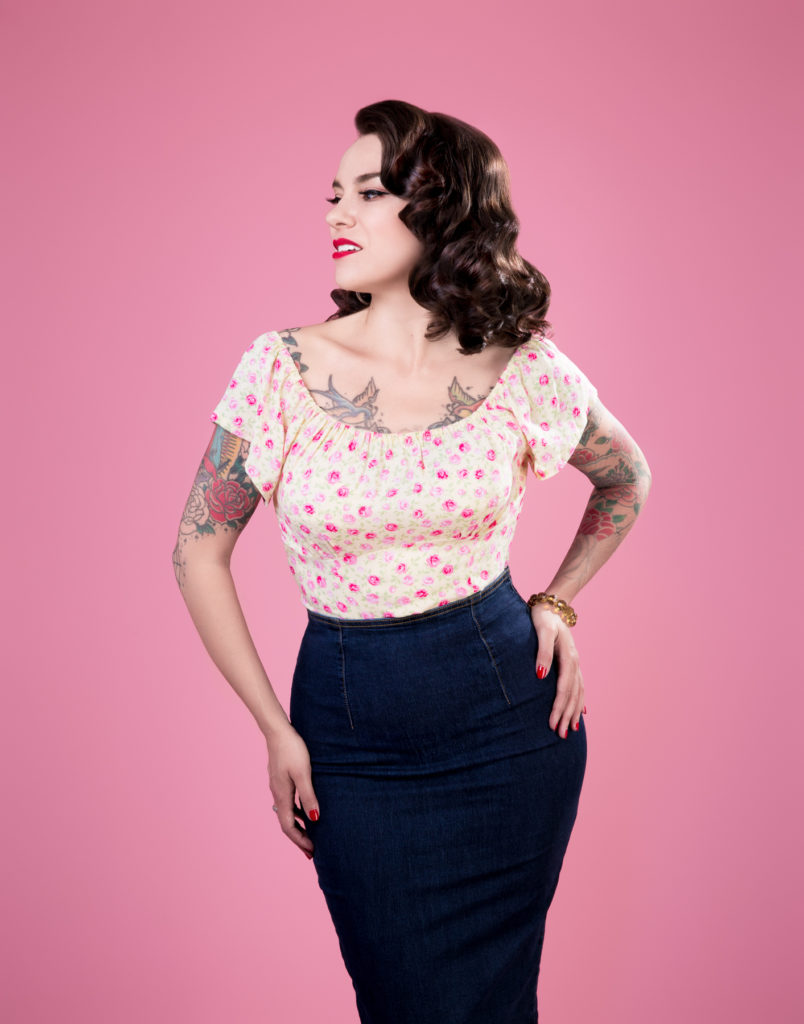
Rita Blouse Sew-Along 2: Choosing a Size
Sep
Are you ready to get started on your Rita Blouse? One of the most important steps in making this blouse (or any pattern, for that matter) is analyzing your body measurements versus the Size Chart and the Finished Measurement Chart to make sure you choose a size you’ll be happy with. All the info you need is on the back of the pattern envelope, as well as the Rita blouse page. See the highlighted block of info below:
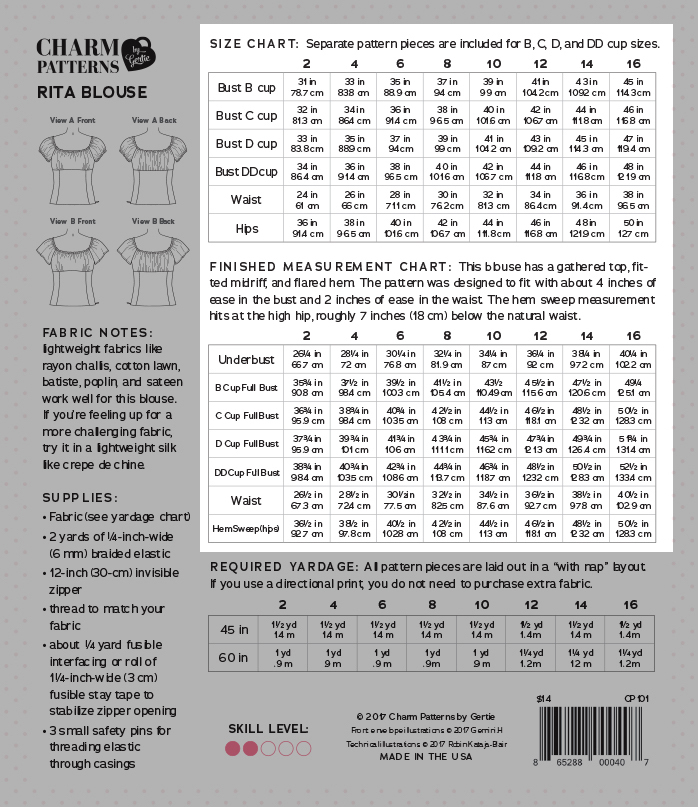
The Size Chart
First, a note on Charm Patterns sizing. My pattern sizes are 2-16 with separate pattern pieces for B, C, D, and DD bra cup sizes. The numeric size is very similar to US Dress Sizes, and also the sizing in my books. (It’s very different from my Butterick pattern sizing, so don’t choose the same size you would for that pattern line.) My sizes differ a bit from ready-to-wear clothing in that my waist-to-hip ratio is larger than most. The size chart is below and it stays the same from pattern to pattern.
As for the cup sizes, they are based on US bra cup sizes. Start by choosing the bra cup size you most normally wear, and then comparing your measurements to the pattern measurements and see if that cup size will work for you. (The cup sizes in the Rita Blouse are quite generous due to the gathers, and I’ve heard reports that the DD is working well for ladies up to an H cup!) You may need to choose a “sister size,” going up or down a cup size depending on your dress size. Don’t get too attached to the number or letter.
Taking Your Full Bust and Waist Measurements
Okay, let’s get to it. The first thing you’re going to do is to measure your full bust, wearing a supportive bra that you plan to wear with the blouse (a style with wide-set straps or strapless style is best). That’s around the fullest part of your breasts, holding the tape measure level to the ground.
Next, measure your natural waist. This is where your body creases when you do the “I’m a Little Teapot” dance move, and it’s probably higher than you think! Keep these measurements written down.
A note on hip measurements: I personally wouldn’t worry too much about the hip measurement for this blouse at this point. The hip measurement on the chart corresponds to the widest part of your lower body, which for me is about 12″ lower than my natural waist. However, this blouse ends 7″ below my natural waist, so that measurement doesn’t really come into play. It’s more important to look at the finished hem sweep measurements in Finished Measurement Chart.
Compare Your Measurements to the Size Chart
See where your measurements fall on the size chart and circle them. You may correspond to a different cup size than you expected, since bra sizing is complex. Keep in mind that it’s really common to fall between sizes, or to your bust be a different size from your waist. We’re not cookie cutters! Luckily it’s easy to adjust the pattern to fit you. More on that later. Before you make any decisions, though, check the finished measurement chart.
Look at the Finished Measurement Chart
This, in my opinion, is the most important piece of information there is regarding fit. The finished measurements change from design to design, depending on the style. To help you understand the amount of ease added to the pattern, there is a small paragraph right before the chart. For the Rita Blouse, there is way more ease than say the Lamour Dress, as they’re totally different styles of garments. Rita is designed to have about 4″ of ease in the bust and 2″ in the waist. This is just a guideline, however, and you may prefer more or less. Given the amount of ease in this particular pattern, if you’re between sizes you can usually size down.
Choose Your Bust Size, and Adjust the Waist Accordingly
One of the biggest areas of confusion in pattern sizing is what measurement to use as your guide when you’re a different size on top vs. bottom. Don’t choose a size based on your waist measurement! Fit to the bust first, and then adjust the waist accordingly. It’s very common to have to add or remove inches in the waist once you have the bust size right. However much you need to add or remove, divide that amount by the amount of seam allowances in the lower bodice. There are a lot of seams, so you may just want to add to the princess seams. For instance, if I wanted to remove or add 2 inches from the waist, I could divide by 8 (two seam allowances per four princess seams), which would give me .25″. Taper in or out from the underbust seam to the waist, adding or removing .25″.
Ask for Help on the Facebook Group!
I think one of the best uses of the Sew-Along Facebook Group is getting advice on sizing. Since it’s a closed group, you can feel free to post your measurements and bra size and get guidance on pattern adjustments.
Any questions about picking a size? Later this week we’ll move on to cutting out your fabric!