Gertie Books, Tutorials
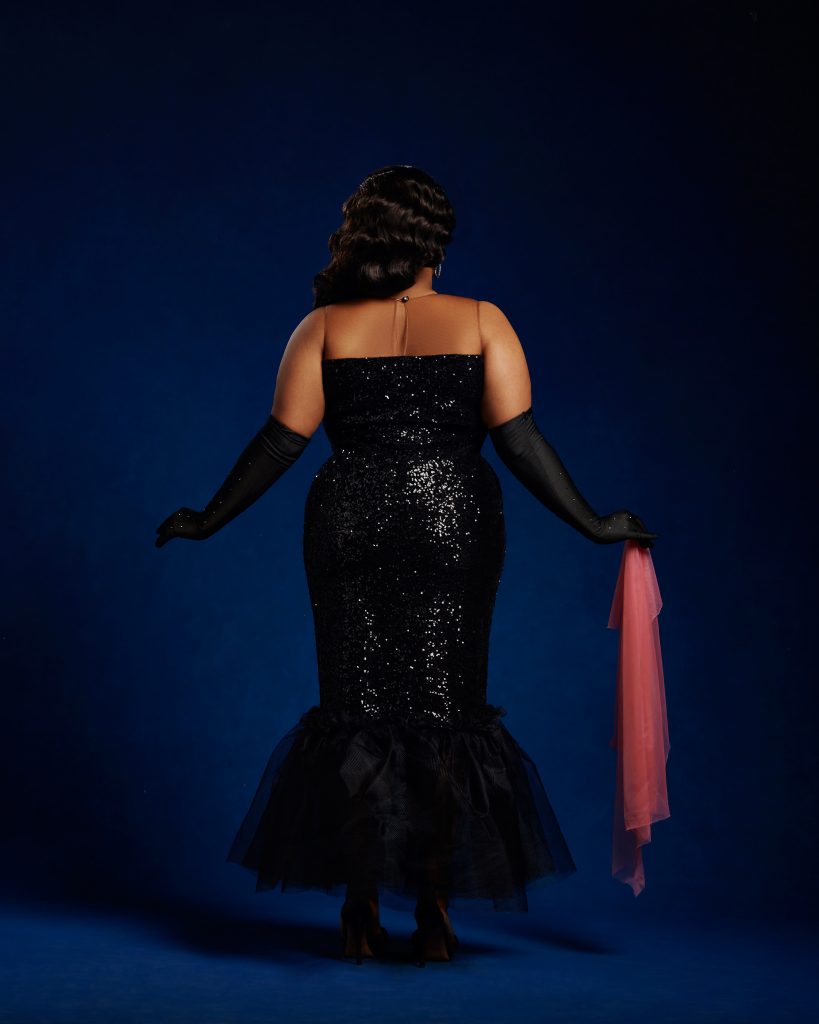
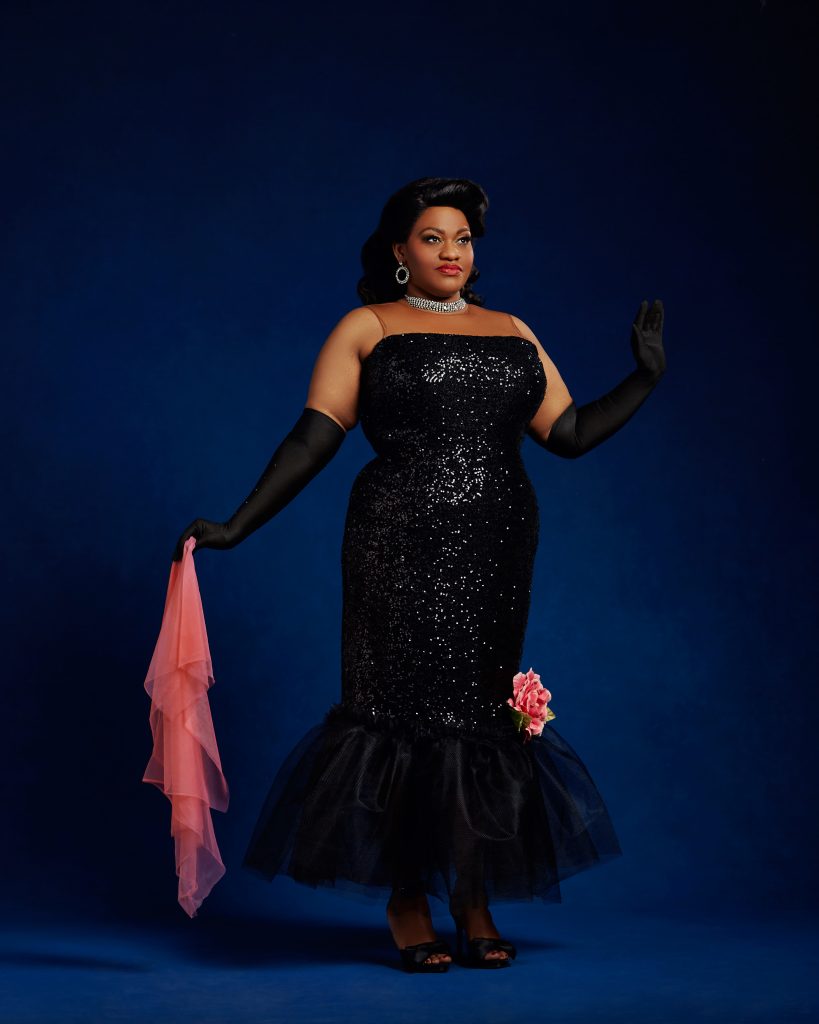
“Solo in the Spotlight” Barbie Dress (Hack of the Gertie Sews Glam Knits patterns)
04
Sep
Sep
We came up with another hack using the patterns from my latest book, Gertie Sews Glam Knits!
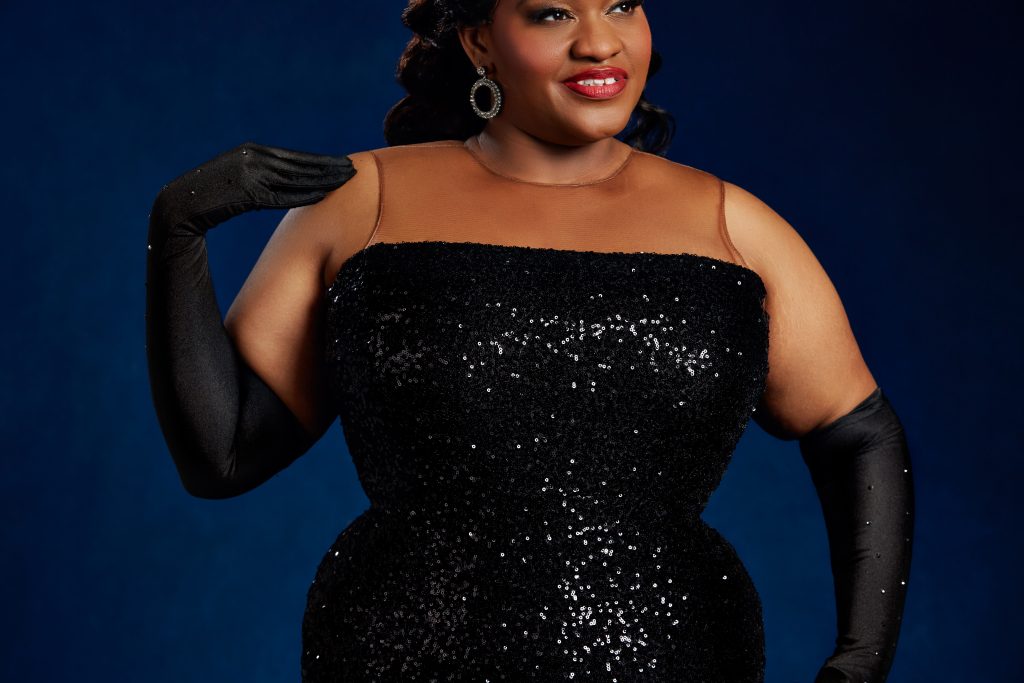
Inspired by the 1960 “Solo in the Spotlight” design created for our favorite blonde collectible, this sparkly dress combines the basic Jewel Neck Top and Pencil Skirt patterns into one glamorous garment.
Resources
- Sequin knit fabric with 50–70% two-way stretch
- Knit lining fabric with the same stretch percentage as the sequin knit fabric. We recommend knit jersey that will be soft against the skin.
- Stretch illusion mesh fabric with 50–70% two-way stretch
- Stiff tulle fabric
- Thread to match
- ¼”-wide (6 mm) clear elastic to stabilize shoulders and waistline
Pattern Pieces Needed
- Self-drafted Illusion Yoke Front (cut 1 illusion mesh on fold)
- Self-drafted Illusion Yoke Back (cut 2 illusion mesh)
- Self-drafted Illusion Bodice Front (cut 1 sequin knit on fold, 1 lining on fold)
- Self-drafted Illusion Bodice Back (cut 1 sequin knit on fold, 1 lining on fold)
- Self-drafted Pegged Skirt Front (cut 1 fabric on fold, 1 lining on fold)
- Self-drafted Pegged Skirt Back (cut 1 fabric on fold, 1 lining on fold)
- Self-drafted Tulle Flounce (cut 3 tulle)
Pattern Drafting for the “Hack” Self-drafted Pattern Pieces
Illusion Bodice Pattern Drafting Instructions
- Prepare bodice for skirt attachment. Cut the Jewel Neck Top Front and Back pattern pieces at the waistline. Add seam allowances below the cut waistline.
- Remove armhole seam allowance. On the top front, draw a line ⅝” (1.5 cm) in from the armscye to remove the seam allowances. Cut away the seam allowances. Repeat on the top back.
- Determine illusion yoke placement. Hold up the top front pattern piece to your body or a dress form to determine where you would like the mesh yoke and sequin fabric to meet to create the illusion of a strapless bodice. Draw this line onto the pattern piece. For Susie’s dress, we started the line at the underarm and curved up to a point 9¾” (24.8 cm) above the waist at center front (CF). Repeat for the top back, drawing a straight line from the bottom of the armscye to the center back (CB), perpendicular to the CB line. Add notches along each line about 2” (5 cm) in from the armscye to help with alignment. Cut along each line to create separate yoke and bodice pieces.
- Draft front yoke. Trace the new yoke pattern piece. Add seam allowances to the armhole and lower edge. Label as Illusion Yoke Front, cut 1 illusion mesh on fold, maintaining the original direction-of-greatest-stretch (DOGS).
- Draft back yoke. Repeat the previous step to create the yoke back. Add seam allowances at the CB. Label as Illusion Yoke Back, cut 2 illusion mesh, maintaining the original DOGS .
- Draft the illusion bodice. Trace the bodice pattern piece. Draw a gentle curve from the underarm seam to the added notch. This will fill in the bodice and help to create the illusion of a strapless dress. Add seam allowances to the upper edge of the bodice. Label as Illusion Bodice Front, cut 1 sequin knit on fold and 1 lining on fold, maintaining the original DOGS. Repeat to create the Illusion Bodice Back, truing the sharp corner into a gentle curve instead of filling in the bodice.
Pegged Skirt with Tulle Flounce Pattern Drafting Instructions
- Draft the pegged skirt. On the Pencil Skirt Front, draw a line 2” (5 cm) up from the hem to shorten the skirt. Mark 1¾” (4.4 cm) in from the side seam at the new hem. Draw a straight line to connect this mark to the hip notch. Trace a new pattern piece. Label as Pegged Skirt Front, cut 1 fabric on fold and 1 lining on fold, maintaining the original DOGS. Repeat using the Skirt Back to create the Pegged Skirt Back.
- Draft the skirt flounce. Draw a rectangle 15” (38.1 cm) wide (or your desired length) by twice the pegged skirt hem circumference long. Add seam allowances to all four sides (G). Label as Tulle Flounce, cut 3 tulle, with the grainline parallel to the long edge.
Sewing Instructions
- Cut out the pattern pieces and transfer pattern markings to the wrong side (WS) of the fabric. Before removing the pattern paper, make a notch at the CF and CB of the bodice neckline and waist. Make a notch at the CF and CB of the skirt waist. These notches will help align the skirt and lining.
- Stitch the yoke front to the yoke back at the shoulder seams with a ⅝” (1.5 cm) seam allowance, right sides (RS) together. Sew again at ½” (1.3 cm). Trim the excess seam allowance, being careful not to cut into your stitches. Press the shoulder seams to the yoke back.
- Cut a long length of illusion mesh 1¼” (3.2 cm) wide for binding. Stitch the binding to the yoke CB opening, RS together, with a straight stitch. Trim SA to ⅛” (3 mm). Fold binding over the SA, wrapping tightly, so the raw edge of the binding just covers the sewn seam. Stitch in the ditch with a straight stitch, from the RS of the yoke, to secure. Repeat to bind the yoke neckline and armscyes.
- Sew the bust dart (busts F–H only) and press the dart down.
- Stitch the bodice front to the bodice back at the side seams, RS together. Repeat for the bodice lining.
- Baste the sequin bodice to the yoke front, RS together, matching notches. Repeat to baste the yoke back, aligning the yoke CB opening to the bodice CB notch.
- Stitch the sequin bodice to the bodice lining, RS together (with the yoke sandwiched between), along the entire upper edge. Grade seam allowances and understitch. Baste the bodice to the lining at the waistline, WS together.
- Sew the skirt front to the skirt back at the side seams, RS together. Repeat for the lining.
- Hem the skirt lining with a ⅝” seam allowance.
- Create three rings of tulle. Gather one raw edge of each length of tulle. Baste together as one along the gathered edge.
- Stitch tulle to sequin skirt lower raw edge, RS together, aligning the tulle seam to one side seam and adjusting gathers as needed. Trim seam allowances and press towards the skirt. The tulle will not stretch, so you may wish to leave approximately 6” (15.2 cm) unsewn at the CB to make sure you can get the dress over your head. Use small hooks and eyes to attach the loose tulle to the dress.
- Baste the skirt to the skirt lining at the waistline, WS together. Stitch the bodice to the skirt at the waistline, RS together, matching notches and side seams, and stitching clear elastic along the waistline as you sew. Hold the elastic taut but do not stretch. Trim seam allowances and press towards the bodice.