Tutorials
Sewing the Rita Blouse in a Knit Fabric
May
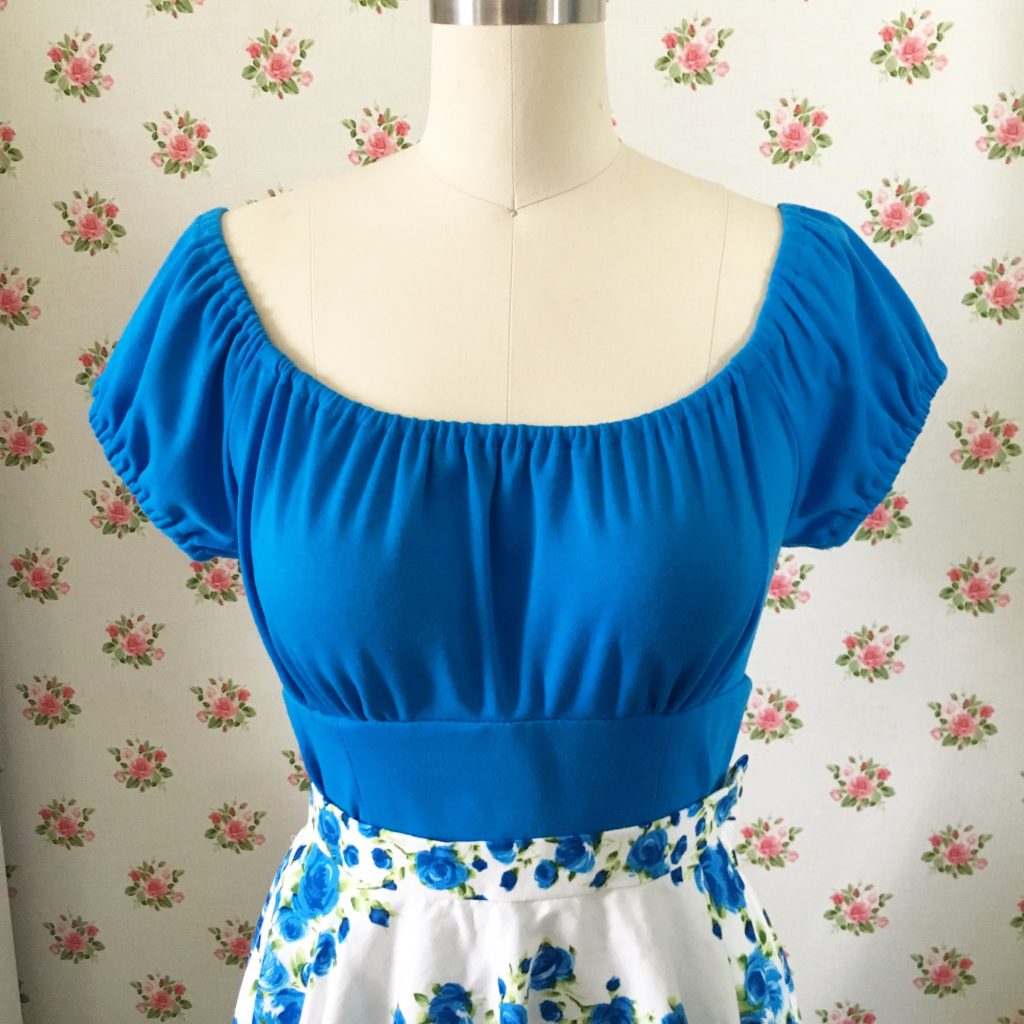
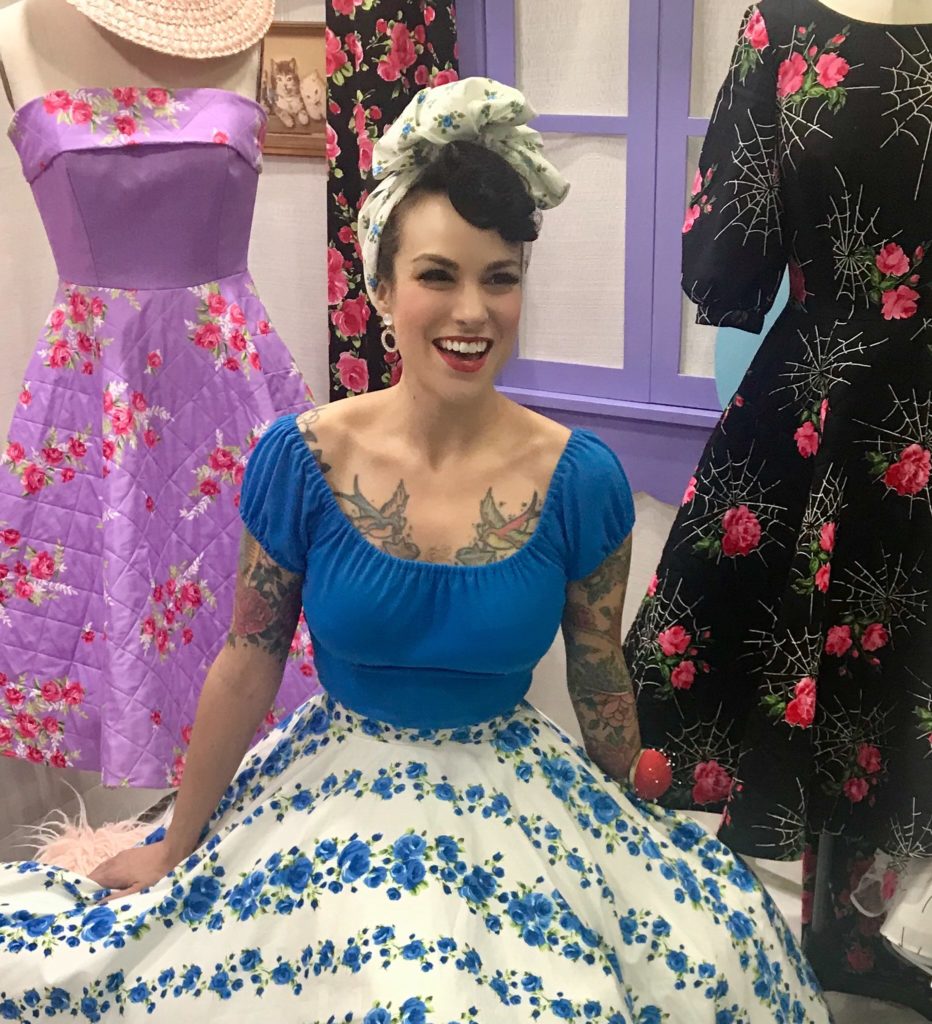
I originally designed the Rita Blouse pattern for woven fabrics, with a side zipper to get a fitted look in the midriff. But I’ve had lots of questions about sewing this design in a knit, since it would make such a comfy t-shirt style top with a vintage twist. You can’t always adapt woven patterns for knits (for instance, the Lamour Dress would be a disaster in knit, since it needs structure for that beautiful fitted bodice) but the Rita was a good candidate for experimentation. I made a version and it was a total success! You do need to adapt your fit and construction methods (and even your undergarments!) though. Here are the changes I made:
Fabric
Choose a knit that is on the stable side, like an interlock or cotton jersey. (Slinky knits aren’t well suited to garments with a lot of seams like this one, and it would also be a nightmare to make those casings in a slippery knit!). I used a pretty blue interlock from Joann’s.
Fit
- Knits can be fitted slightly smaller than wovens to take advantage of their body-hugging stretch. I made an easy adjustment of just taking in the side seams tapering from the underarm down, using a 1″ seam allowance rather than the usual 5/8″ seam allowance. You could also make a smaller size-but my reasoning for not doing that was that I didn’t want the proportions of the garment to change, just the snugness at the midriff.
- My recommendation would be to make the pattern as suggested first (in a woven, with a zipper), and make any fit adjustments needed to the original pattern before experimenting with a knit. Many people need to adjust this pattern in the waist (waist adjustments are one of the most common I see in any design) so it’s good to start with the correct fit before trying something new!
Construction
- For your major construction seams, use a stitch with a little stretch. I recommend a narrow zigzag (around 1.5 mm wide).
- Use a ballpoint or jersey needle.
- Omit the zipper and ignore any steps relating to the zipper in the instructions. You can just sew the entire left side seam closed when you do the other vertical seams.
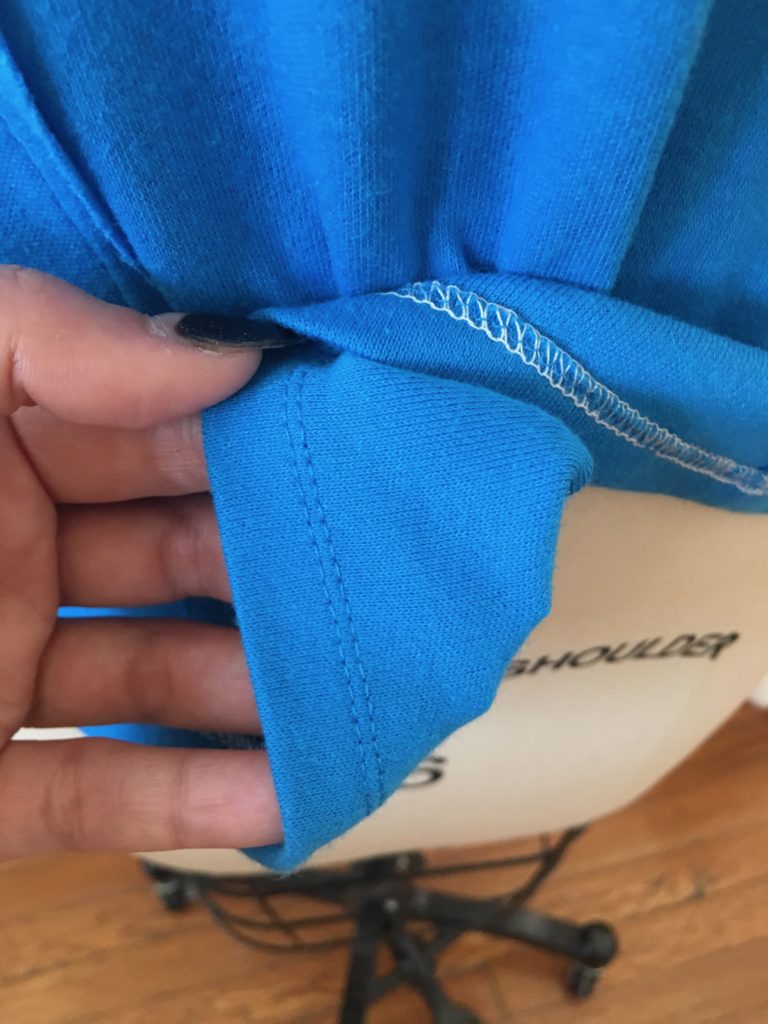
- For the casings at the neckline and armhole, I simplified by serging and trimming down the seam allowance by ¼”, and then folded in the raw edge 3/8″ and pressed. Then edgestitch the fold to form your casing. (So you have a single fold casing, rather than double. Knits can be fiddly to press and fold twice.) Use a straight stitch for your casings! This stitching doesn’t actually need to stretch; that’s what the elastic is for.
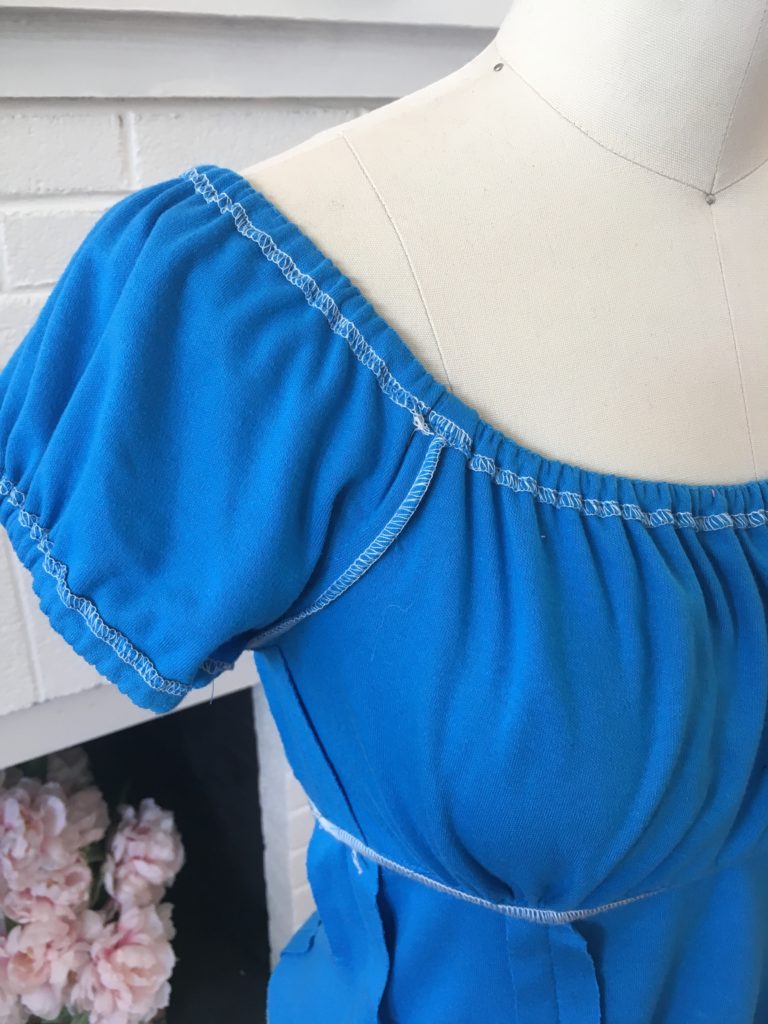
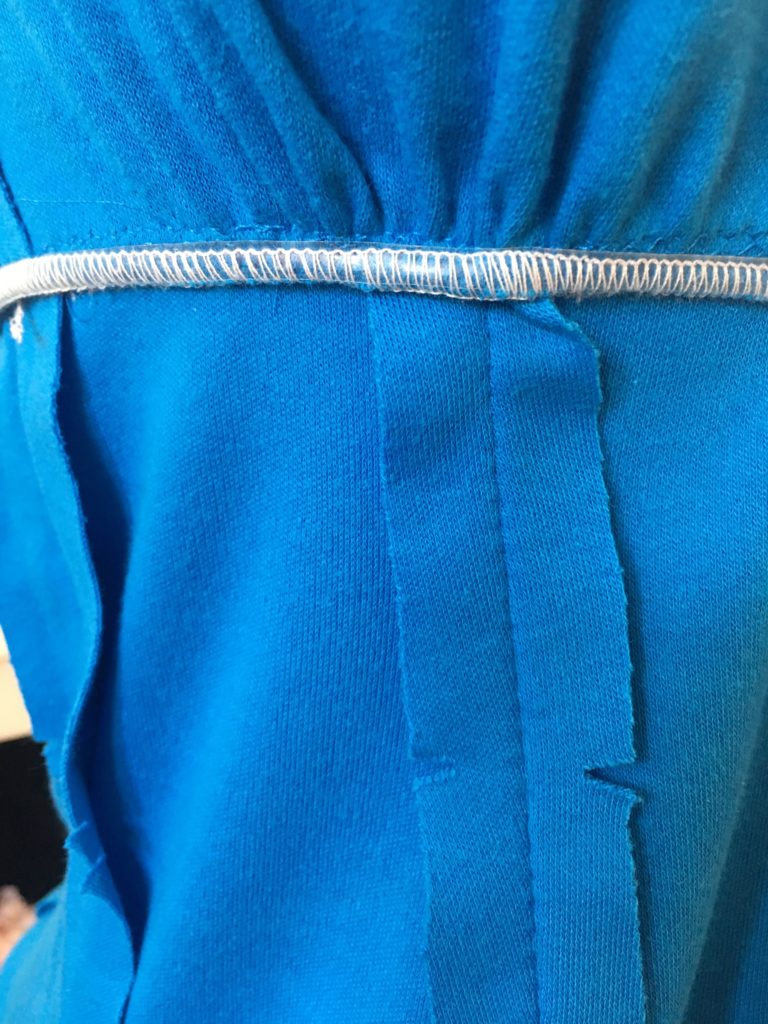
- I stabilized the underbust seam with clear elastic, since I worried that the interlock would stretch out of shape and look baggy around the midriff after pulling it over my head several times. Sew the underbust seam as usual. I applied 1/4″ clear elastic with my serger, stretching it slightly and trimming down the seam allowance simultaneously. Alternatively, you could trim the seam allowance down to 3/8″, then use a wide zigzag stitch on your sewing machine.
Hemming
I serged the raw edge of my hem allowance and then turned it up 5/8″. I topstitched with a twin needle, which is a really lovely and stretchy finish for knits. (Yes, your machine can use a twin needle! Just install the twin needle and thread two spools of thread through in your machine, threading one thread into each respective needle.)
Alternatively, use a stretchy stitch like a zigzag for hemming.
Foundation Garments
I often wear a structured 50s-style bra with the Rita top, like this merry widow. However, I was reminded why bras with lots of seaming are not a great choice with knits! My bra seams were showing in every picture I took wearing this top (the horror!). There’s a reason there’s something called a “t-shirt bra.” A balconette style bra with wide straps and smooth molded cups would be the best choice here.
These are just my experiences sewing the Rita Blouse in a knit, and I’m pleased with the outcome! Let me know if you have any questions or recommendations.