Halloween Extravaganza, Tutorials
Vampira Costume (Lorelei Dress Hack)
Oct
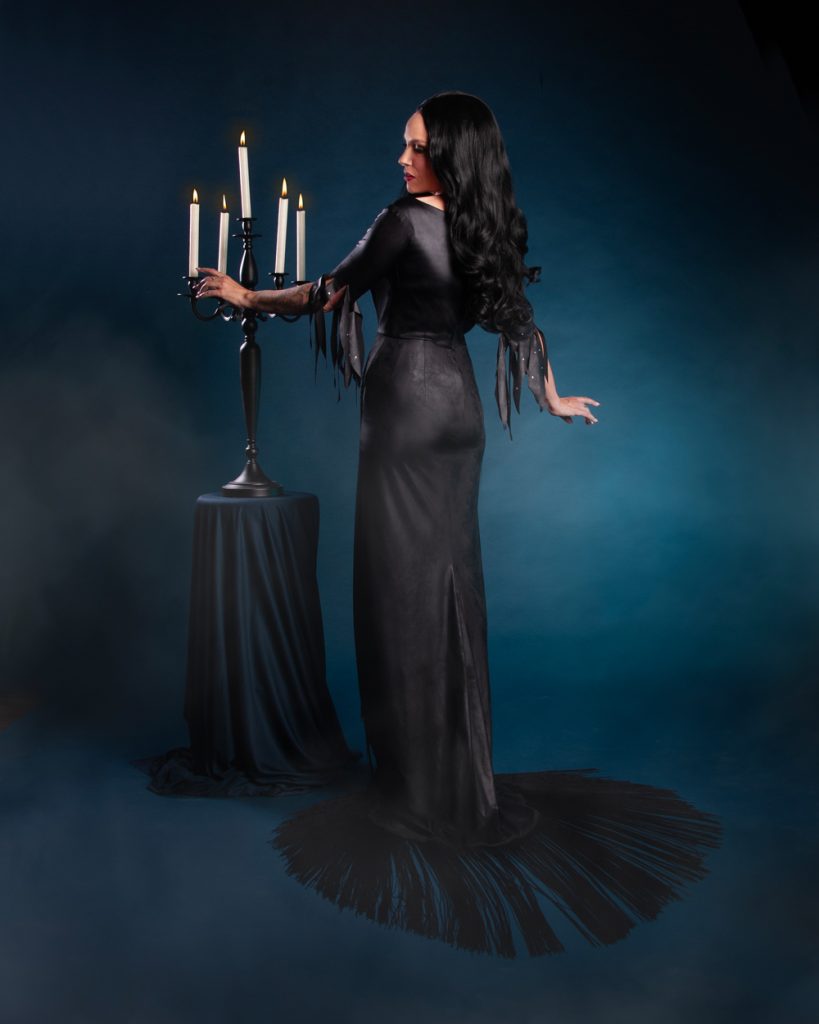
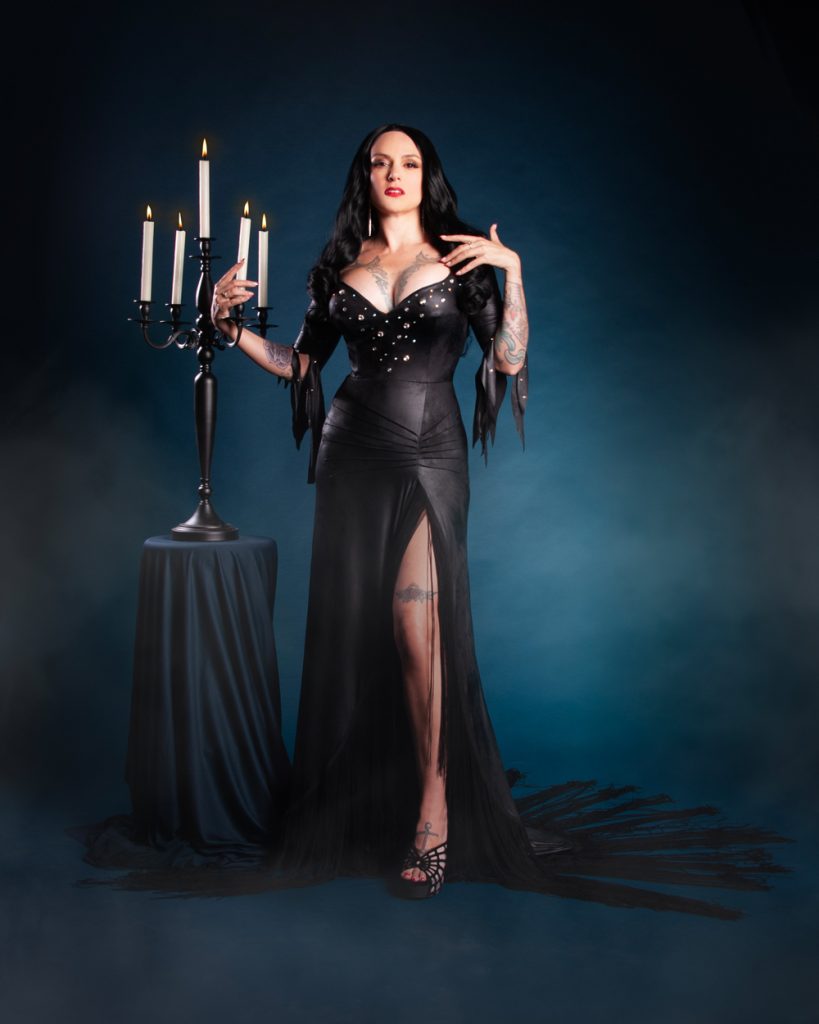
It’s not the Halloween Extravaganza if I don’t bring my not-so-secret goth side out to play! This hack of the Lorelei Gown came out even better than I expected.
But first, some inspiration! Vampira (played by Maila Nurmi) was a character in a tv show, The Vampira Show, that ran for one year (1954-1955) and was only broadcast to the Los Angeles area. It has become a cult classic and influenced many of the “spooky” shows and characters we love today. Here’s a few of my favorite looks:
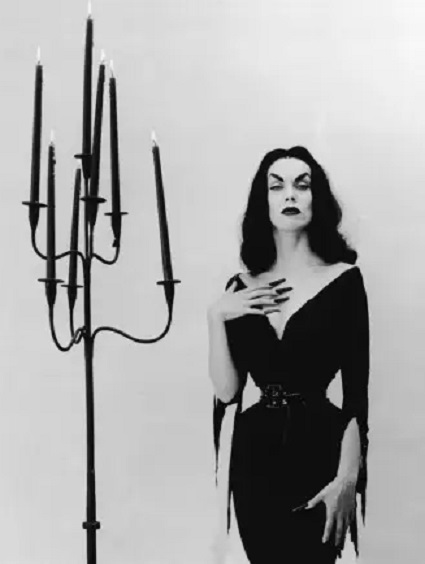
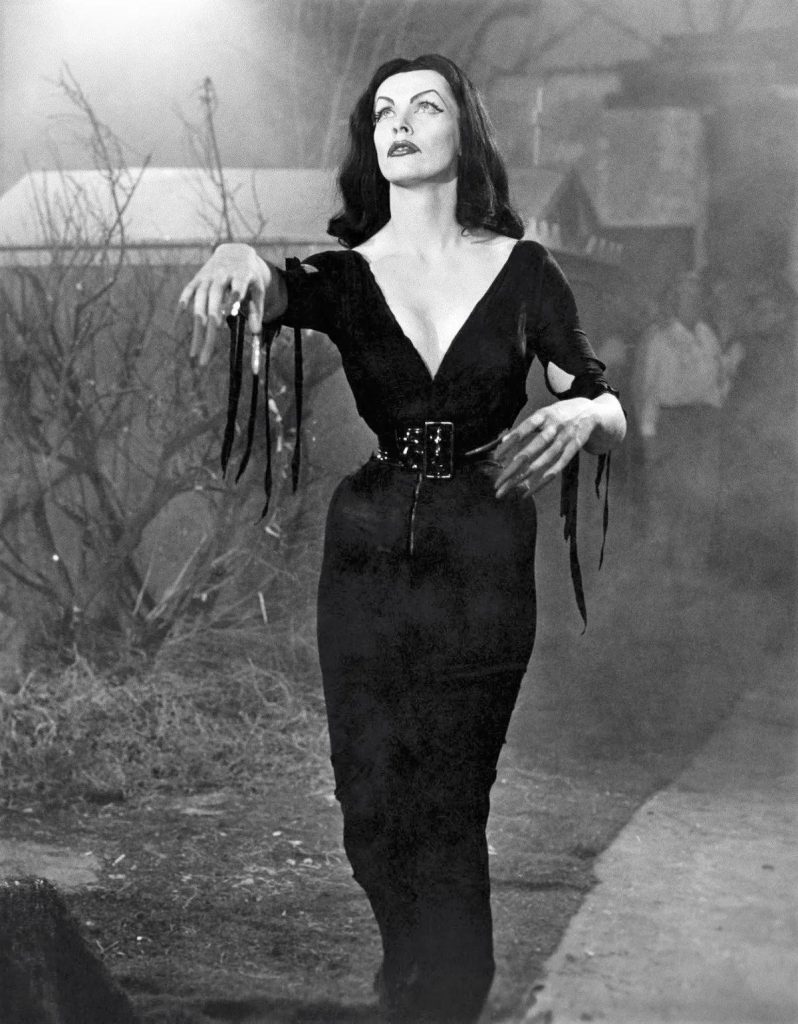

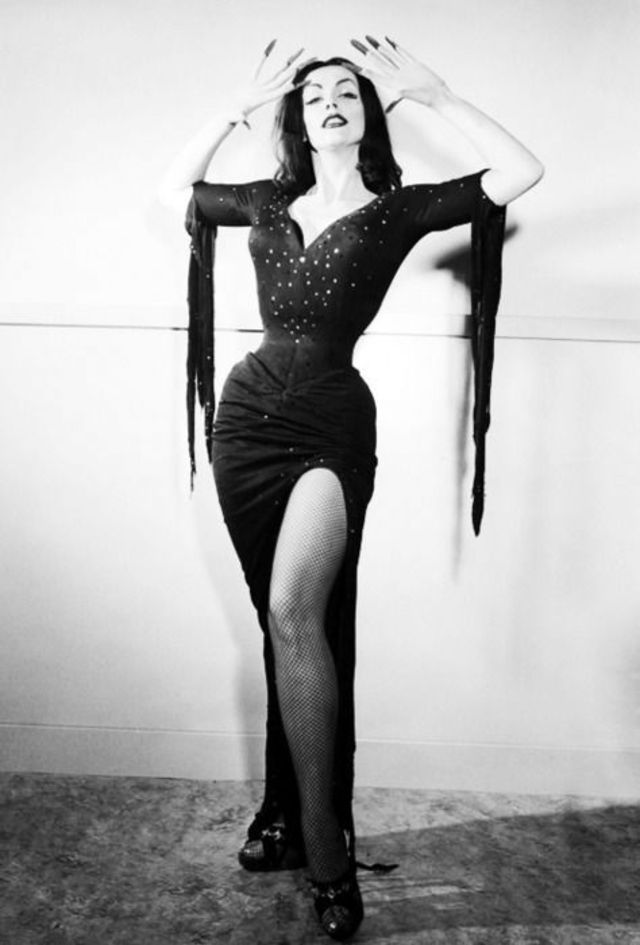
While I’ll never achieve that hip-to-waist ratio (!), the lines of her gowns are so similar to the Lorelei Gown that I knew it would make the perfect pattern hack for Halloween.
Resources
- Lorelei Gown pattern
- Black knit leather-look fabric (I’m obsessed! It feels and sews like a ponte knit, but looks SO glam.)
- Power net, lining, thread, a long invisible zipper, and everything else in the Lorelei instructions
- 24-inch-long black fringe
- Rhinestones from our stash (there’s tons available on Etsy)
- Long black wig and as much black eyebrow pencil as you can handle
Vampira Gown Pattern Alterations
- Draw the seam allowances on the Lorelei Gown Bodice Front Insert (2) pattern piece. Fold the Bodice Front Insert in half lengthwise, as you will be cutting the front bodice on the fold. Measure the neckline edge of the pattern piece (not including the seam allowances!) from the folded edge to the long raw edge. This measurement will be short, around an inch or so.
- Tape tracing paper to the Bodice Front (1) pattern piece at the center front. Draw a line from the upper CF circle away from the pattern piece, roughly perpendicular to the grainline, equal in length as your measurement in Step One. Draw a line from the lower CF circle to the waistline, parallel to the grainline. Draw a line to connect the two points to create your new center line; connect the end of the first short line to the point where the second line crosses the waistline. This will be your new center front and will be cut on the fold. Draw the “cut on the fold” arrows and scribble out the original grainline.
- Using a French curve, draw in a new neckline, in any shape you wish. My neckline comes to a deep V point just below the level of my apex, and curves up to the shoulder (about 2 inches or 5 cm away from the armscye edge). Sometimes, I like to pin the pattern piece to my dress form just to help me visualize everything. After you’re happy with the way your neckline looks, add 5/8 inch (1.5 cm) seam allowance, then cut out and label the pattern piece.
- Measure the distance of the shoulder edge of your new bodice front, without seam allowance. On the Bodice Back (3) pattern piece, draw a line from the armscye edge along the shoulder equal to this distance (without seam allowances). This will make sure the front and back meets perfectly across the shoulder seam. Draw a long from this mark to the center back seam, to create the new back neckline. I drew a curved line using a large French curve, mimicking the original neckline. Once you’re happy with your back neckline, add 5/8 inch seam allowance, then cut out the pattern piece, truing the neckline dart as needed. Label the pattern piece.
- It’s a bit hard to tell because of the shaggy cut fabric, but the bicep area of the sleeve remains the same as the Lorelei Gown, and ease is added from the elbow to the wrist to create a bell shape. For the sleeves, draw a line perpendicular to the grainline on the Sleeve (4) pattern piece, about 1 inch (2.5 cm) above the notches. Draw five lines, about 1 inch apart, parallel to the sleeve centerline from this line to the wrist edge. Slash and spread these five parallel lines to create a bell shape, then tape to a new piece of pattern paper and true the hem edge. You can go as dramatic as you’d like; my sleeve hem ended up being almost a half circle! Cut and label the new pattern piece.
Vampira Gown Sewing Instructions
Follow the Lorelei Gown sewing instructions to create the bodice, cutting the new Bodice Front on the fold in fabric, lining, and power net. Ignore all references to the Bodice Front Insert.
Before inserting the sleeves, try on the bodice and adjust the front waist and bust darts as needed. Some of the bust shaping of the original pattern was provided by the bodice front insert, so you may need to pinch out additional fabric to create a perfect fit. Adjust as needed.
For the sleeves, omit the lining. Sew as usual, then insert into the bodice.
Follow the rest of the instructions to complete the gown (with the panty).
After construction, sew the long fringe around the entire hem, all the way up to the tip of the thigh slit. Use scissors to cut ragged edges on the sleeve hem all the way up to the elbows. Hand sew rhinestones to the sleeves and bodice as desired. Then throw on a black wig and your bra with the most oomph, draw on some dramatic pointed eyebrows, and get ready to scare the neighborhood children!