Gertie Books, Tutorials
Making the Marie Antoinette Costume Sleeves
04
Sep
Sep
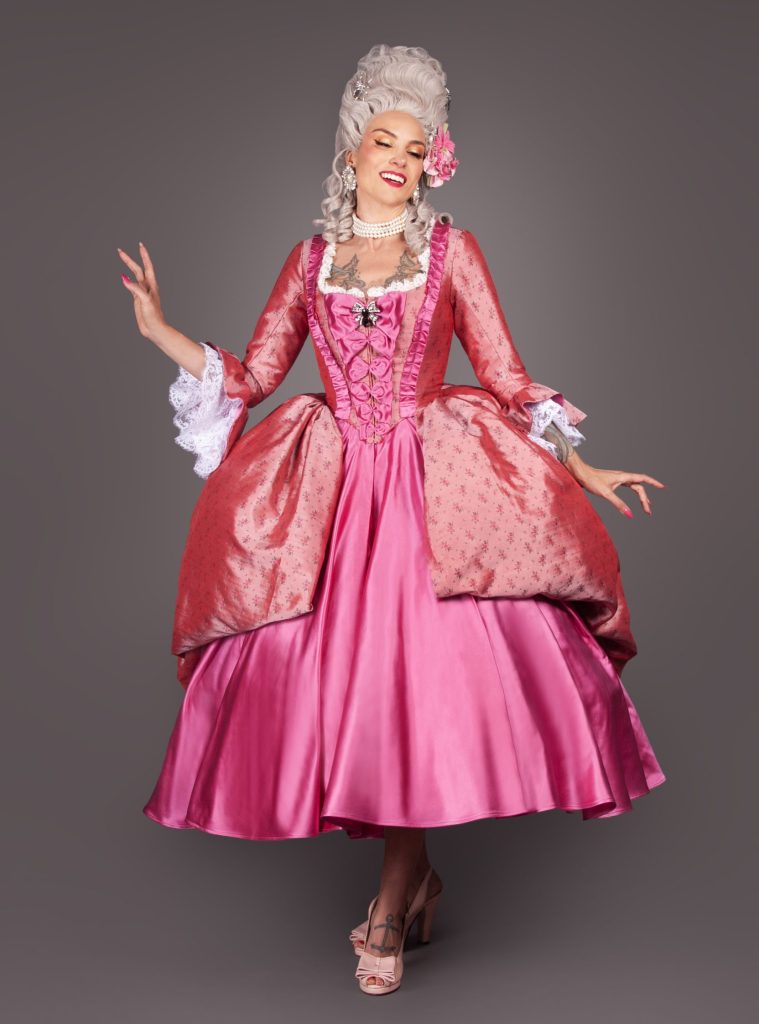
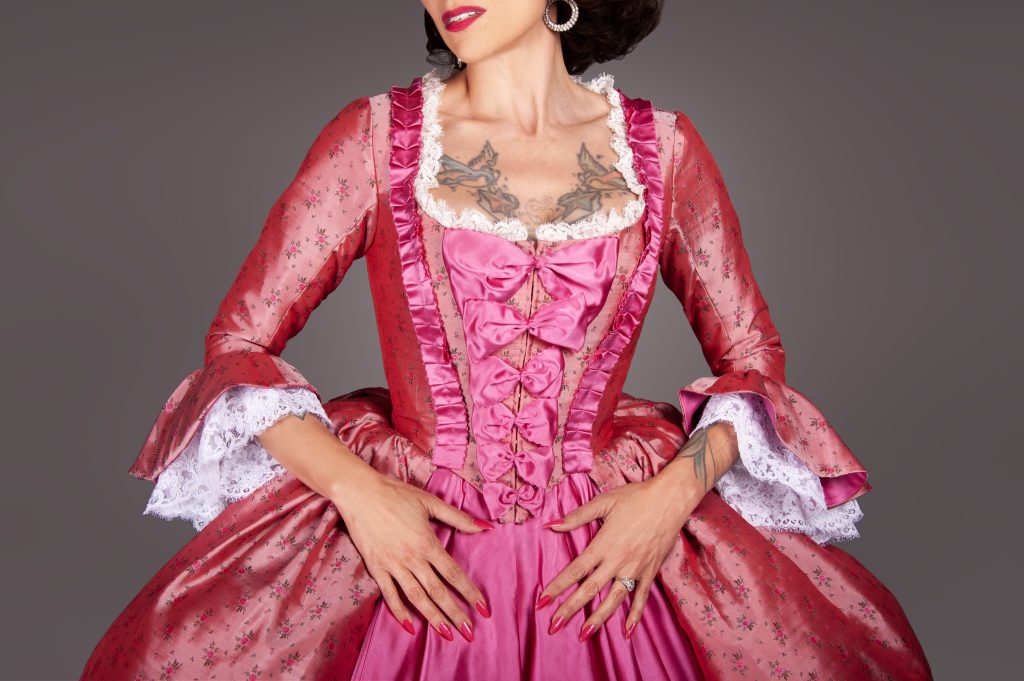
Thanks to Jacky Sanger, our summer studio mate, we were able to draft a historically accurate* fitted sleeve with a layered cuff for our Marie Antoinette costume. She then hand-tacked Alençon lace motifs to some flocked tulle fabric to create the perfect oval ruffle as a bit of decorative trim. We do love to go over the top for our Halloween Extravaganza patterns!
Resources
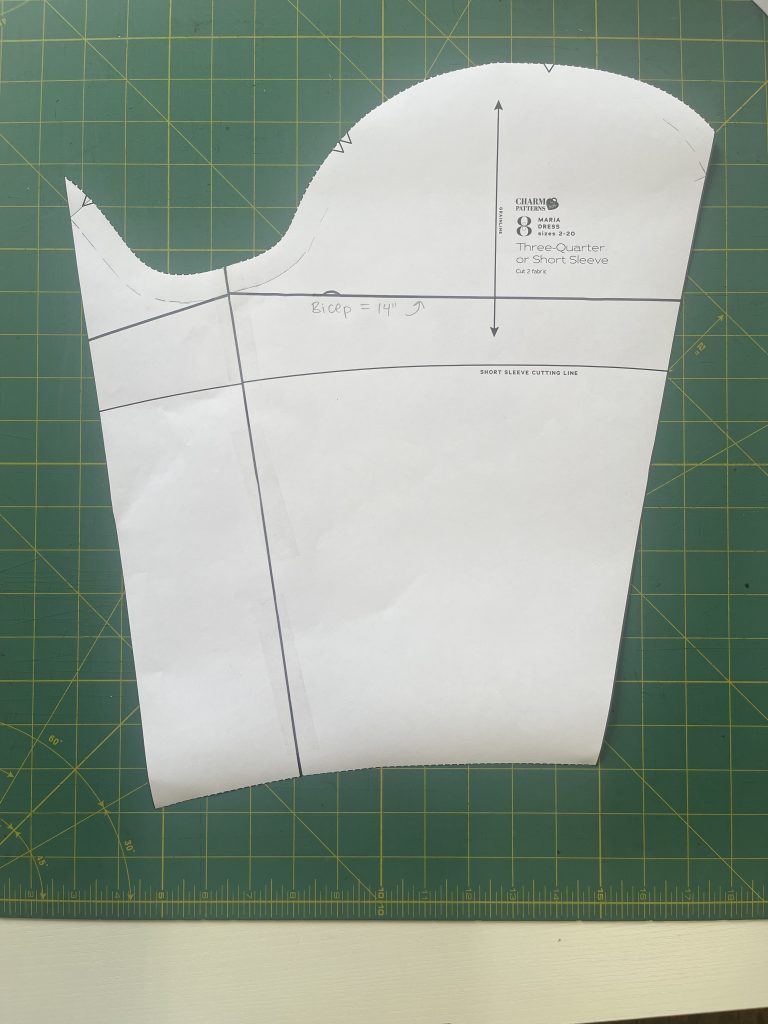
- The sleeve from the Maria Dress pattern
- The usual pattern drafting paper, rulers, tape, markers, and supplies
- Gumption!
Pattern Drafting for the Sleeve Pattern Pieces
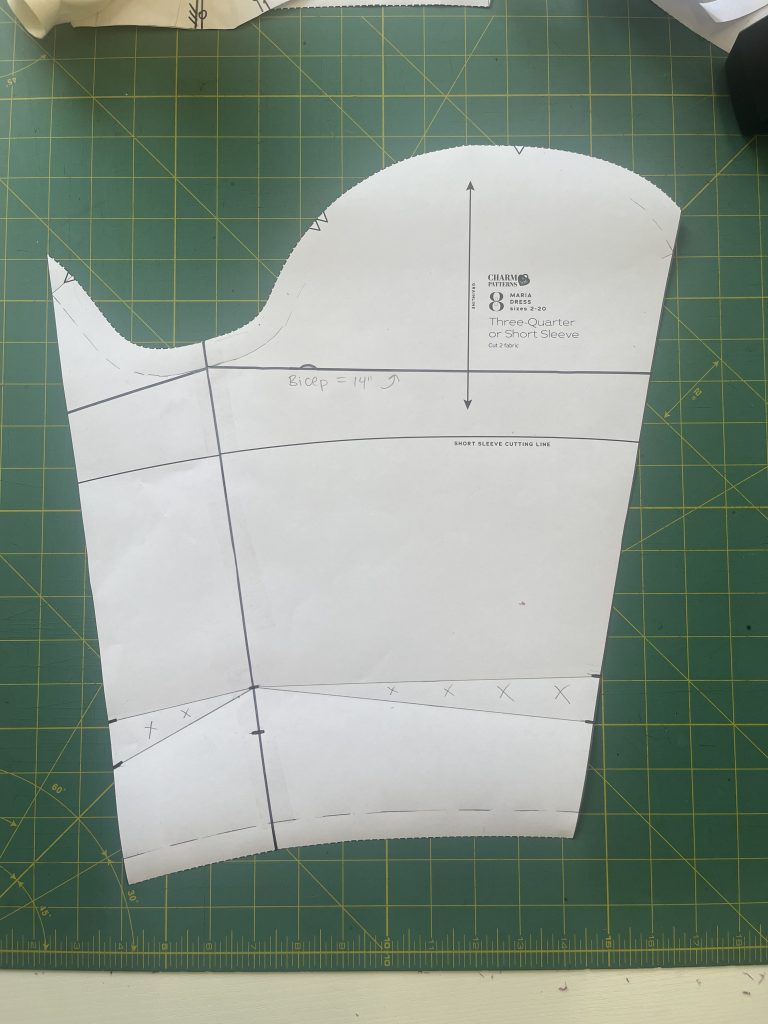
- Make the Maria three-quarter sleeve, as the pattern requires. Try it on and pinch out where the elbow bends (on the front of the sleeve, not the seam). Make any other necessary fit adjustments, and pinch out any extra ease. This is a very fitted style.
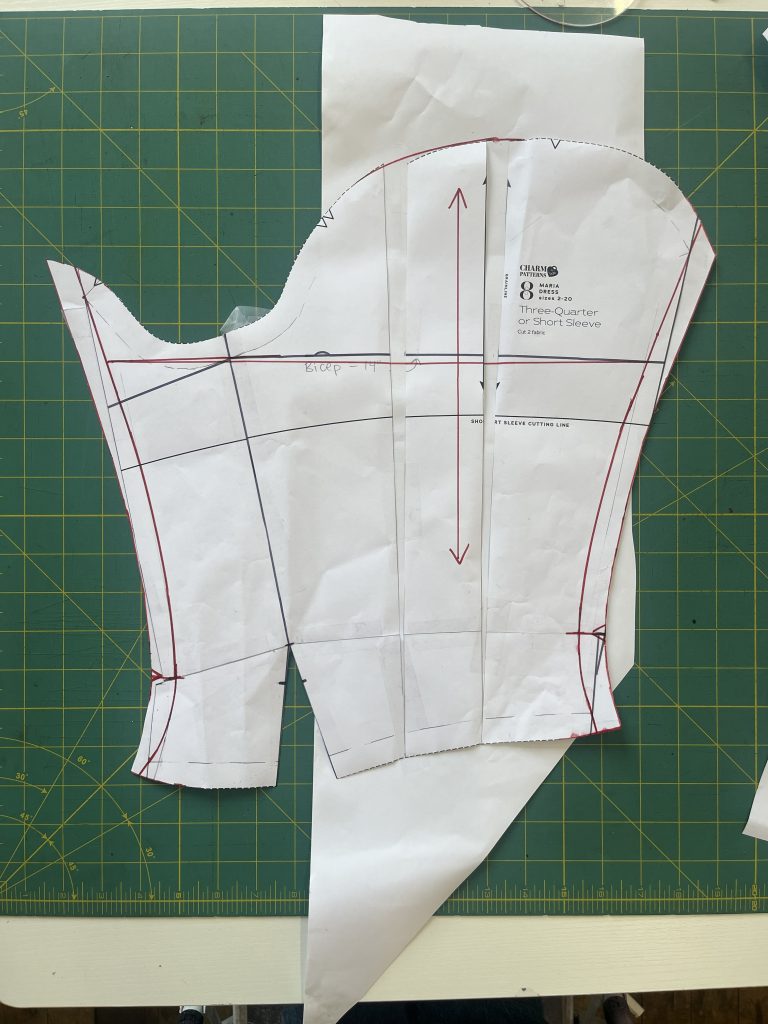
- Remove the seam allowance from the vertical sleeve seams. Mark 5/8 inch (1.5 cm) down from the underarm, then draw a straight line connecting the underarm points. This marks the bicep line. Take a measurement of the bicep line, and write it someplace safe.
- Mark the sewline at the front armhole notch (5/8 inch or 1.5 cm from the armscye edge). Draw a line through this point parallel to the front sleeve seam. This will be the new (single) vertical sleeve seam. It is VERY forward of modern sleeves, as you can see in the image above.
- Cut along the new seam line. Tape together the other vertical seams so you have one sleeve pattern piece. Mark a notch on the sleeve cap at the original sleeve seam line (this will help when sewing it to the bodice). Transfer any of the fit adjustments from Step One to the sleeve pattern.
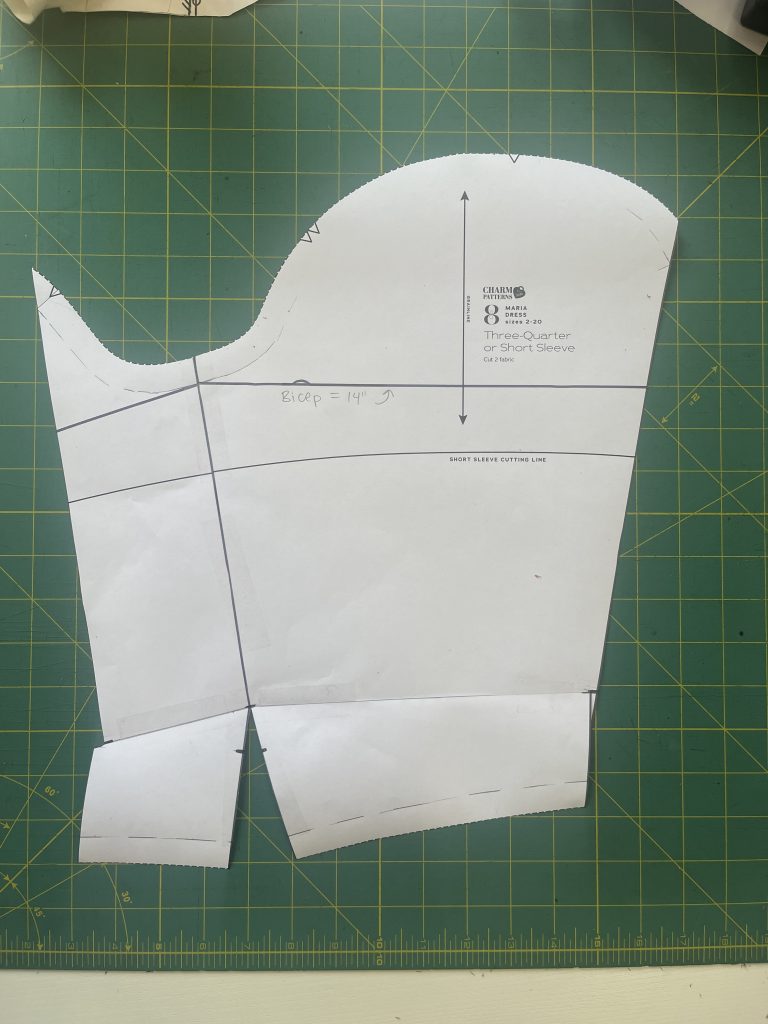
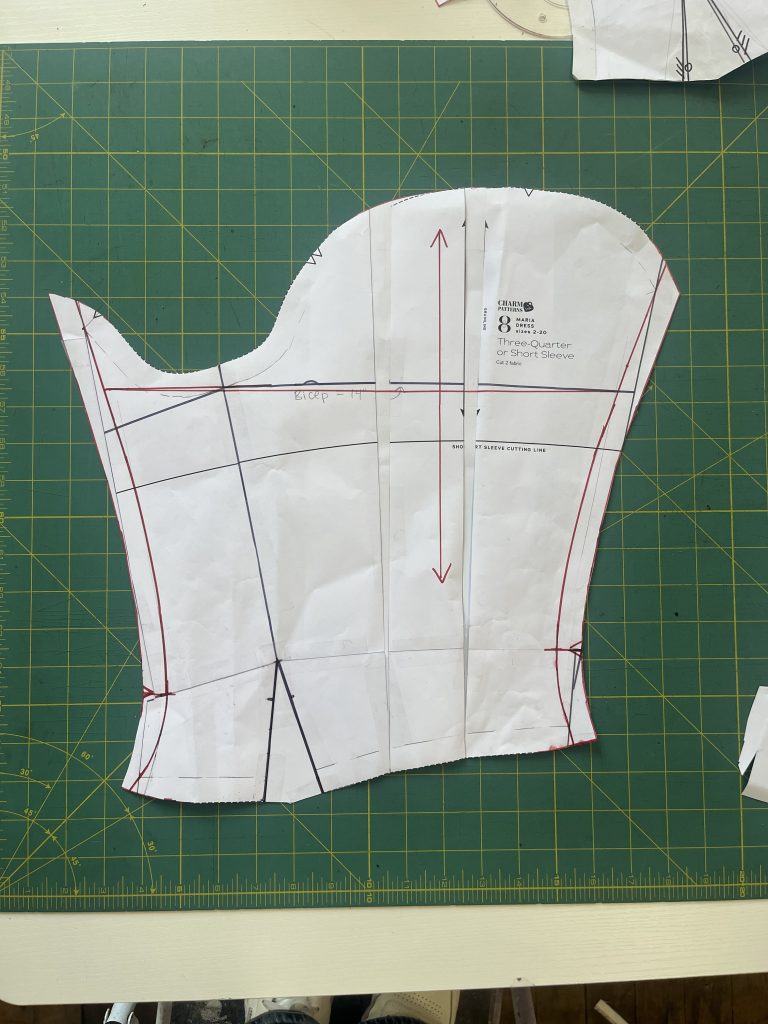
- Transfer the location and amount of elbow pinch on the original sleeve seam and on both sides of the new sleeve seam. Connect the points as shown in the drawing below. Cut along these lines and pivot so they meet, then tape. Add paper behind the gap at the sleeve hem and tape. When sewing, this triangle at the hem will be a dart, so mark it as usual for darts.
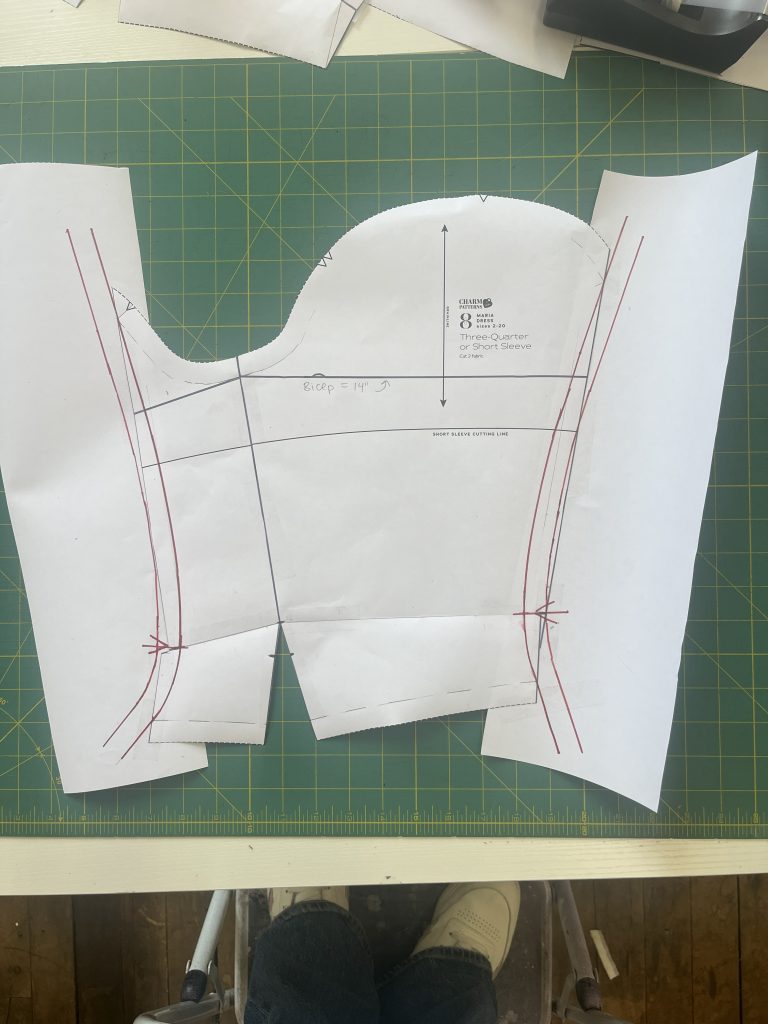
- Redraw the new vertical sleeve seams into a smooth curve. Add back the seam allowances for the vertical seam. Mark a notch on each vertical seam where the elbow excess was pinched out; this will help match the sleeve sides when you sew them together.
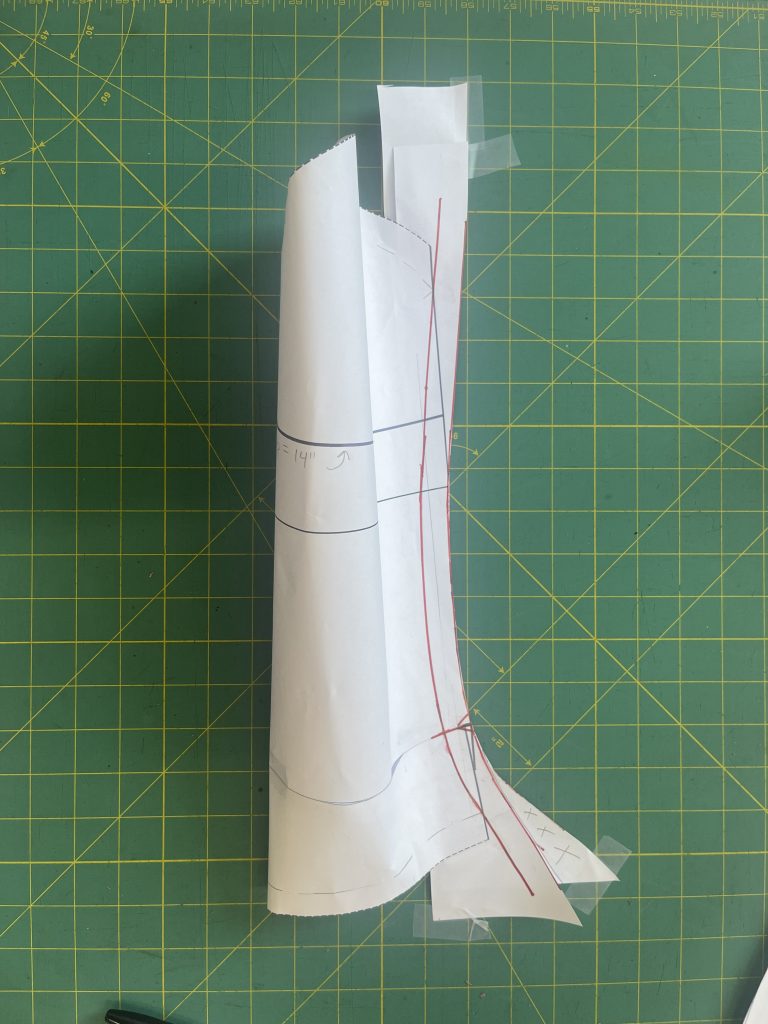
- Roll the paper sleeve together into a tube to line up the sleeve seams, and make sure the curves are the same. The sleeve will want to twist; this is expected. If the curves are not the same, adjust as needed.
- True the sleeve cap and sleeve hem.
- Measure the new bicep line; it is perpendicular to the grainline and passes through the underarm sew line. It’s likely shorter than your previous bicep measurement. Draw two slash lines between the shoulder notch and double back notch, parallel to the sleeve grainline.
- Slash and spread until your bicep measurement is correct. The pattern at the sleeve hem should hinge; you are adding only to the sleeve cap. Tape down to new pattern paper underneath. Draw new bicep and grainlines. True the hem and sleeve cap. When sewing, you’ll gather between the sleeve notches before attaching the sleeve to the bodice.
- Be sure to make a muslin to test the new sleeve!