Sew Along
Rita Blouse Sew Along 5: Steps 6-8
Oct
It’s that time: zipper time! This is the part I’ve seen the most trepidation about in the sew-along group. It’s really not difficult, I promise! As mentioned in the supplies post, I do personally like to use an invisible zipper foot. However, many swear by using a regular zipper foot, and there are plenty of tutorials on line for that method.
But! Before we get to that, there’s step 6, trimming the zipper. On your zipper, cut away the tape above the top zipper stop.
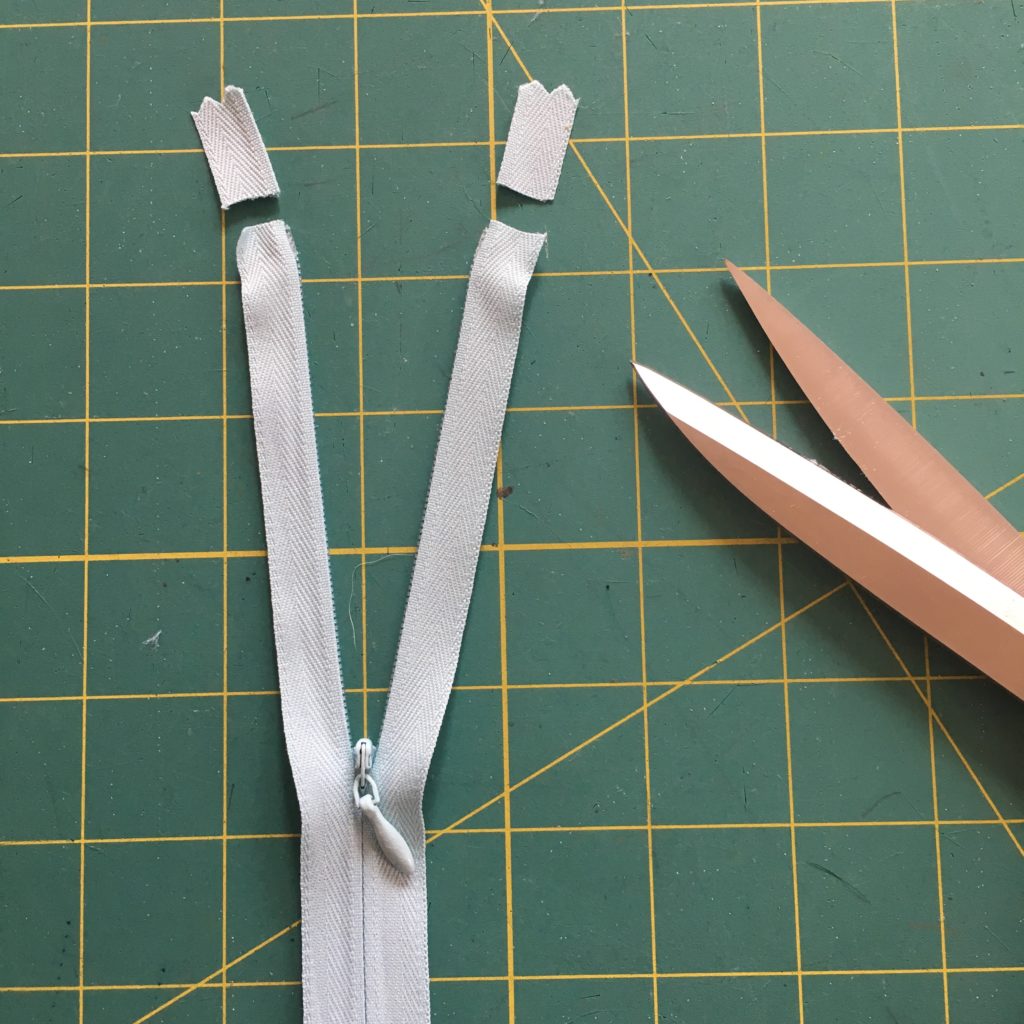
Keep in mind that you may also need to shorten your zipper length. Some zippers are labeled as 12-14″, which really just means that they are 14″ and you’re able to shorten them yourself down to 12″ (just like any other zipper!). If you shorten it, create a thread stop over the zipper at the new length by zigzagging or hand stitching over the teeth.
At the end of the video, I mentioned finishing the seam above the zipper. I use a regular zipper foot for this step (which lets me get closer to the zipper) and start just about 1/8″ away from the zipper line of stitching, leaving a little gap between the two lines of stitching. I did a little zoom-in on the technical illustration so you can see what I mean!
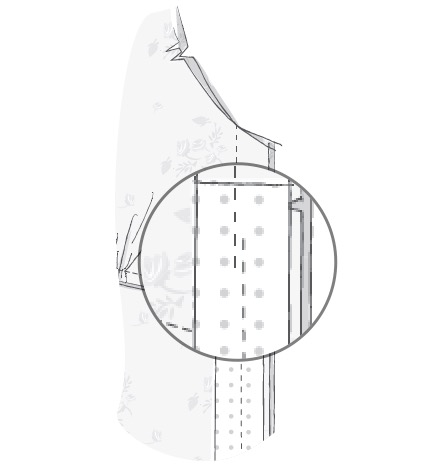
This little gap is what helps you avoid having a pucker at the top of an invisible zipper. Then finish the seam as usual and press open.
I think that’s enough for one day! Next week we’ll move on to the sleeves, elastic casings, and testing the fit. We’re about halfway done now!
Thank you! I’m so glad you did a video on the zipper. Very helpful. My first with working with woven fabrics or a putting in a zipper in about 25 years, other than quilts.
I just wanted to say that you are the best teacher in the world, and I really value and appreciate all you do for us fans/sewists. <3